GraceDeveloping
RVF Regular
- Joined
- Jul 11, 2021
- Messages
- 5
- Location
- NEW ORLEANS, LA
- RV Year
- 2002
- RV Make
- Terry
- RV Model
- 27h
- RV Length
- 27ft
- TOW/TOAD
- Ford F350
- Fulltimer
- Yes
Newbies here again still dealing with and living in the 02 Terry TT during the water damage disaster, summer of '21….. As I mentioned in our intro, we know nothing and have a lot to figure out. We could use your help greatly….
Today we focused on our one slide and the surrounding wall. The slideout mechanism is manufactured by Power Gear. This slide area once contained the living and dining room furniture (almost all existing furniture is gone except kitchen cupboards, bath vanity and the nightstands.) but only the original tabletop remains. The slideout mechanical equipment is in great shape and works properly under level circumstances.
It was a soft spot on the aft floor area of TT, drivers side near the slide wall that alerted us to the water intrusion issue (in our 3rd week of Full Time RV living).
Over the next several weeks we followed the prescribed DIY procedures for repairing damaged RV subfloor due to water intrusion. This included: check and re-seal penetrations, weak spots, etc. on the exterior; check all water supply lines; open up the affected area and remediate any mold; allow to dry; reframe underfloor for subfloor replacement; replace insulation and subfloor with ¾" plywood (marine grade).
As we installed the new insulation and ¾" plywood subfloor the hubs decided to check the other side "just in case." Although not soft, water had saturated the entire subfloor from the storage compartment in front to the entry door on the passenger side. Shortly after that, we learned about and obtained a moisture meter and began to rue the day we ever saw this trailer. And our ignorance on moisture meters.
Once we could beat back the fog of depression and face the mess in front of us, we discovered that the slide wasn't lining up when we attempted to retract it. One side was higher or lower and it didn't extend fully. Unfortunately, opening the slide exacerbated the problem. It wouldn't "sit" properly, flush to the floor, with a 2” gap preventing it from sealing correctly and opening us up to more water damage. (did I mention it has rained every day?).
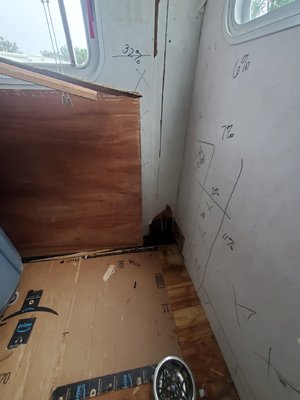
We had seen some splintered pieces of panel board at the top of the slide trim previously but didn't understand it was because that area was failing and completely saturated. Again, the moisture meter really opened our eyes to the situation. (If you look at pictures and see numbers, those are the meter reading % - drywall. Areas with an X were too high for our meter to read).
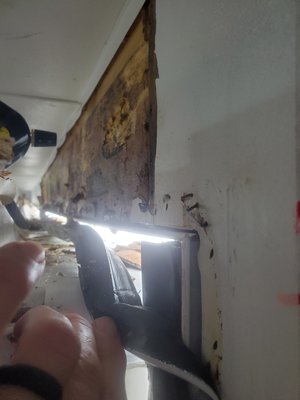
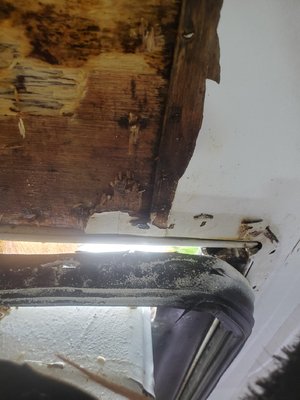
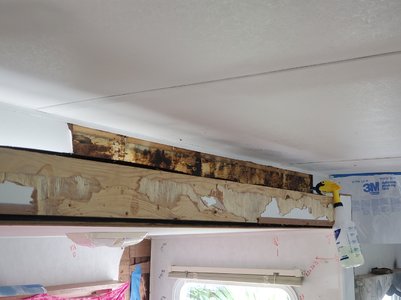
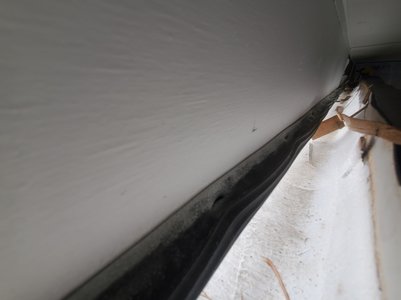
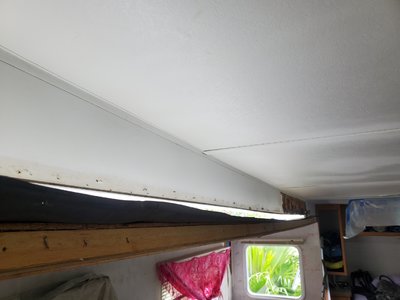
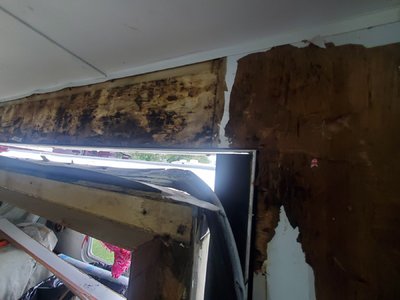
Further investigation exposed some water damage on the header, from the middle of the slide to the aft area/bedroom corner. Underneath at the rear side slide, the fascia is decayed. Additionally, there is damage at the interior aft/ bedroom side corner bottom (pictures below/included).
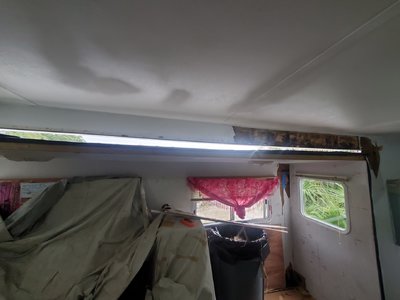
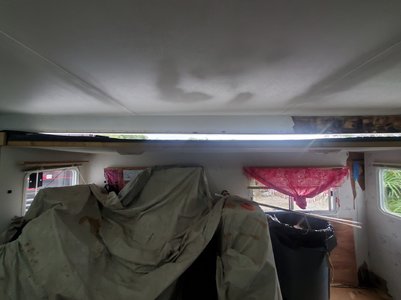
After crawling underneath our TT and really studying our rig, we could see the sagging on the front aft corner of the slide and the bowing in the middle of the slideside ceiling.
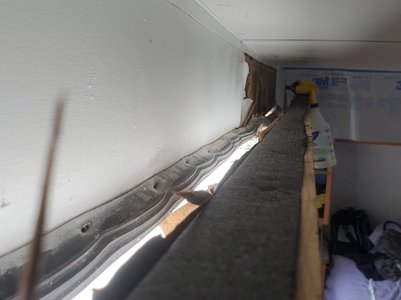
Today, we removed the trim pieces around the slide, slowing working our way back until the header for the slide top and aft side had been removed, the rubber membrane unstapled and the top and aft side were exposed (see pix). Half of the header is so damaged it is not sound, and the husband is constructing supports for the interior ceiling and the slide exterior.
Our questions ( and remember we know nothing ):
Even though only half of that header is terrible, we have to replace the whole thing, huh? Anything we should know about this?
If we have to replace the whole thing, we will also be replacing the rubber gasket stapled around the inside of the sidewall around the slide. But it seems to us that stapling a gasket like that is simply begging for water intrusion. The wife says it should be glued in place and then sealed with something like Lexel. Husband says that seal has no relevance to the water intrusion problem and should be put back as is. The wife believes she knows a bit about water intrusion and understands that you open a way for water to get in every time you put a penetration into a surface. Even if on the inside. When the rest of the trim board was removed on the exterior side of that gasket/membrane area, it was saturated. Has anyone ever addressed this and re-engineered a proper flashing/gasket fix?
We can't take the slide out. We just really can't. So how the heck are we going to fix it if we don't? Any tips? Any tricks? Has anyone been in this situation? The ceiling has not delaminated, and the slide itself is good except for that corner area. What engineering is required here? And would you replace every existing gasket?
We still don't know if all the leak issues are resolved. Is that necessary? And is there a proper order and method involved when repairing a leaky trailer that may never stop leaking?
What would you do, as far as a repair? Where would you start?
We did review the underfloor really closely and check under all the cupboards in the kitchen and back of the tub, etc. The plumbing is not the cause. Most likely, it is the front corners – that vulnerable spot at the curve and the application of additional sealant probably only once in this trailer's life. Poor Terry. The moisture meter overloads when placed on the aft sidewall of the bedroom, except for underneath the bedroom window. Hallelujah, at least the windows don't seem to be leaking.
A side note…we had suffered from very low water pressure since we moved in. We had also replaced the fixtures in the kitchen and shower with no visible improvement. However, the harbinger of our current problems was demonstrated in the stinky, leaky, and well-used existing toilet. But our new low profile, elongated ceramic bowl toilet with ancillary spray nozzle not only cured the stench created after we installed our Maxxair fan in the bathroom sun-vent it also solved the water pressure problem. Not that we really know why. We're just grateful for the victory.
Full disclosure…..it may have been after the husband made repairs using eternabond and dicor that the intrusion was exacerbated. We don't know. But wife noticed bubbling on paneling after repairs and really want's to believe she wasn't that much in denial and altogether avoiding the obvious.
Attachments
-
 20210712_092701.jpg237.6 KB · Views: 32
 -
 20210712_092853.jpg317.9 KB · Views: 28
 -
 20210712_092920.jpg454.4 KB · Views: 29
 -
 20210712_092937.jpg572.4 KB · Views: 28
 -
 20210712_092947.jpg703.1 KB · Views: 28
 -
 20210712_123201.jpg423.1 KB · Views: 28
 -
 20210712_130517.jpg776.2 KB · Views: 28
 -
 20210712_130521.jpg768.2 KB · Views: 28
 -
 20210712_130531.jpg251.4 KB · Views: 28
 -
 20210712_130540.jpg820.6 KB · Views: 28


