A-Texan
RVF Regular
- Joined
- Jan 16, 2023
- Messages
- 76
- Location
- Texas
- RV Year
- 2022
- RV Make
- Gulfstream Kingsport Ultralite
- RV Model
- 199RK
- RV Length
- 23
- Fulltimer
- No
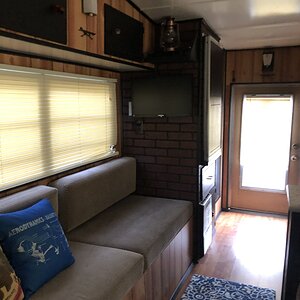
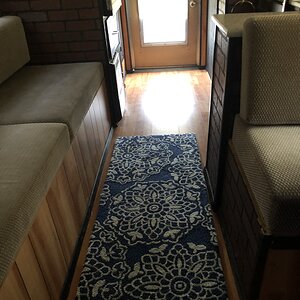
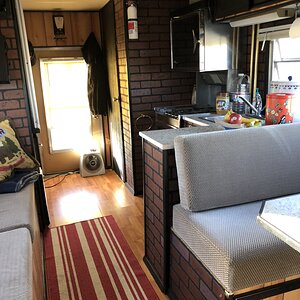
I thought I would add in here a few small things I have done to the interior to keep the trailer a little less cluttered and to keep the wife happy.
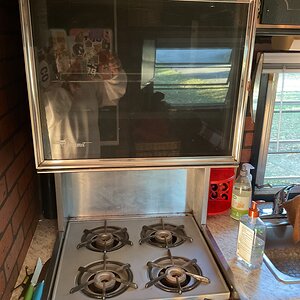
I wasn't sure about installing an actual backsplash in the kitchen area of the trailer (of course while I was preparing to install a new tile backsplash in our home that the wife picked out for our kitchen, she found a product for me to put in the trailer ). So being the good husband I am, I installed it. Just in case anyone wants to do something like this to their own, here is what we used and how it came out (it was pretty light weight material, so I was surprised). Of course while purchasing our home kitchen backsplash tile, thinset, and grout, my wife proved to me there was a backsplash suitable for the trailer, and it was even on clearance 50% off or so (I don't remember what the original price was, but I found a similar one online at Lowes running for $10.98 per square ft - I am thinking this is geared towards trailers because I can't imagine putting it in the house when you could put tile, but who knows). So she put it in the shopping cart and let me know it was getting installed, and I complied. I also installed a mirror that happened to match perfectly with our trailer (because who doesn't need a mirror right), paper towel holder, two soap dispensers and two extra shelves which I painted (already had the paint left over from re-painting the garage last year) to make them look a little would grain like.
Soap Dispensers $12.98 each
Paper Towel Holder $15.98
Backsplash cost around $50 (on sale)
Cabinets cost around $14 (on sale - wife just happen to see them one day while we were at the hardware store)
Acrylic caulking cost $3.98
Total: $109.92 + tax
Similar Product Same Store

When adding the backsplash, I could slightly see the lines in between the tiles and it didn't look right, so I actually got a tube of acrylic caulking, and added a little water to thin it and used it to fill in the lines which also worked as extra adhesion to be sure the edges didn't attempt to pull away and it looks great (when doing this, after using a wet paper towel to work it in the cracks, use another clean damp paper towel to immediately wipe off the excess, then a dry paper towel to finish drying it. I also used the caulking to seal all edges and corners. It has been on for a few years now and is still holding up well and looks fantastic, so I thought I would share. Basically, its like a 3D sticker, has adhesive on the back already and you simply use a box cutter and square to create a line on it and snap it to size when needed. Normally when setting tile you find a center line and work from the middle out (I tiled my entire home), but for this project I broke that rule and tiled from the corner on the left side out and it still turned out fine, the texture of the tile really helped, if they would have been large subway type tiles I would start from a center line so they terminate at both ends with the same size tile, just a disclaimer. Also be sure to clean the wall with alcohol before setting these types of tiles so they will stick well if you decide to try something like this (any debris or grease on the wall would prevent adhesion).


I added a soap dispenser for the kitchen with dishwashing soap and one in the bathroom with just regular handsoap so we don't need the bottles of soap lying around or a bar of soap out (we just refill them each time we go on a trip - note I add a strip of masking tape around the dispensor container once installed beneath the cabinet to make sure it does not vibrate loose and spill while in transit). It is super easy, just get a hole saw and a drill, make one hole and set in the soap dispensor and screw the fastner on the opposing side inside your cabinetry.

 and
and
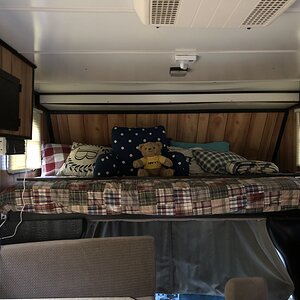
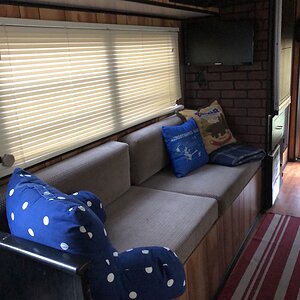
The wife also purchased these two small wooden crates we modified with some non-slip matting and painted with a grainy texture to have an extra place to place our tv remove, phone etc. by the bed (top left near bed), and the other we use to place our vegetables, etc. near the sink/kitchen area (top left on side of existing cabinet).


I wasn't sure about installing an actual backsplash in the kitchen area of the trailer (of course while I was preparing to install a new tile backsplash in our home that the wife picked out for our kitchen, she found a product for me to put in the trailer
). So being the good husband I am, I installed it. Just in case anyone wants to do something like this to their own, here is what we used and how it came out (it was pretty light weight material, so I was surprised). Of course while purchasing our home kitchen backsplash tile, thinset, and grout, my wife proved to me there was a backsplash suitable for the trailer, and it was even on clearance 50% off or so (I don't remember what the original price was, but I found a similar one online at Lowes running for $10.98 per square ft - I am thinking this is geared towards trailers because I can't imagine putting it in the house when you could put tile, but who knows). So she put it in the shopping cart and let me know it was getting installed, and I complied. I also installed a mirror that happened to match perfectly with our trailer (because who doesn't need a mirror right), paper towel holder, two soap dispensers and two extra shelves which I painted (already had the paint left over from re-painting the garage last year) to make them look a little would grain like. Soap Dispensers $12.98 each
Paper Towel Holder $15.98
Backsplash cost around $50 (on sale)
Cabinets cost around $14 (on sale - wife just happen to see them one day while we were at the hardware store)
Acrylic caulking cost $3.98
Total: $109.92 + tax
Similar Product Same Store
When adding the backsplash, I could slightly see the lines in between the tiles and it didn't look right, so I actually got a tube of acrylic caulking, and added a little water to thin it and used it to fill in the lines which also worked as extra adhesion to be sure the edges didn't attempt to pull away and it looks great (when doing this, after using a wet paper towel to work it in the cracks, use another clean damp paper towel to immediately wipe off the excess, then a dry paper towel to finish drying it. I also used the caulking to seal all edges and corners. It has been on for a few years now and is still holding up well and looks fantastic, so I thought I would share. Basically, its like a 3D sticker, has adhesive on the back already and you simply use a box cutter and square to create a line on it and snap it to size when needed. Normally when setting tile you find a center line and work from the middle out (I tiled my entire home), but for this project I broke that rule and tiled from the corner on the left side out and it still turned out fine, the texture of the tile really helped, if they would have been large subway type tiles I would start from a center line so they terminate at both ends with the same size tile, just a disclaimer. Also be sure to clean the wall with alcohol before setting these types of tiles so they will stick well if you decide to try something like this (any debris or grease on the wall would prevent adhesion).
I added a soap dispenser for the kitchen with dishwashing soap and one in the bathroom with just regular handsoap so we don't need the bottles of soap lying around or a bar of soap out (we just refill them each time we go on a trip - note I add a strip of masking tape around the dispensor container once installed beneath the cabinet to make sure it does not vibrate loose and spill while in transit). It is super easy, just get a hole saw and a drill, make one hole and set in the soap dispensor and screw the fastner on the opposing side inside your cabinetry.
The wife also purchased these two small wooden crates we modified with some non-slip matting and painted with a grainy texture to have an extra place to place our tv remove, phone etc. by the bed (top left near bed), and the other we use to place our vegetables, etc. near the sink/kitchen area (top left on side of existing cabinet).