A-Texan
RVF Regular
- Joined
- Jan 16, 2023
- Messages
- 76
- Location
- Texas
- RV Year
- 2022
- RV Make
- Gulfstream Kingsport Ultralite
- RV Model
- 199RK
- RV Length
- 23
- Fulltimer
- No
Once again I am sharing, because if anyone is like me seeing your kids' shoes tossed around the trailer is bothersome. I love our small trailer, but I like keeping the floor clear and putting shoes on the couch or bed is not an option for myself. To remedy this I have made an extremely low cost shoe rack for every travel trailer we have owned and it is very simple to make.
Total Cost for Project $25.48 plus tax (I already had the paint and wood screws from a previous project so it is not included in the cost).
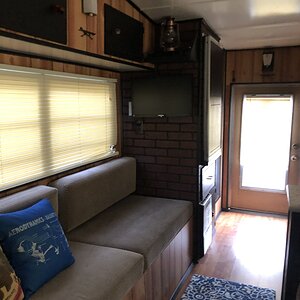
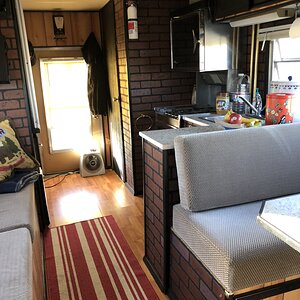
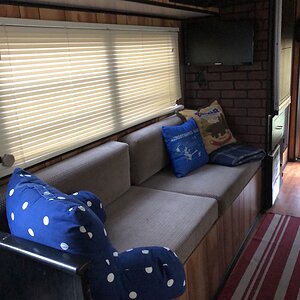
This was my dinette before the shoe rack, there was plenty of room to build one behind it (see pic below):

1. I bought 4 cedar fence pickets and cut 5 pieces roughly 28.25 inches long (my rows) and 2 pieces around 30 inches long (my two edge columns). Last of all I used the left over scraps to create my center column to make sure the boards didn't warp.

2. After cutting the pieces I used the two long pieces for the columns on the outer edges and the shorter pieces for the rows inside. I first placed all the parts together on a flat surface to be sure about how it looked and then I began drilling pilot holes on the outer frame and installed two wood screws connecting each corner together (wood screws).

3. Next, I installed the rows within the square frame I now had, creating 4 rows (3 boards in all) spaced roughly 7 inches apart from one another and then I drilled pilot holes through the columns to the horizontal boards and installed two screws in each side to support them.
4. I then installed the center support boards made out of the scraps I had left over installing two screws through the top of the shoe rack to connect the first and two screws in the bottom row board up through the center support (I can't emphasize enough, drill pilot holes or the wood will split). Once the first one was on I installed the rest in like manner with the exception of the top of each support (which you now can't drill into because there is a board on top), for the top of each one installed I drilled a single screw on the back side of the shoe rack that couldn't be seen making a pocket hole joint using a counter sink so it would sit flush (I don't have a jig and just did it by hand trying to hold it at a steady angle).

5. Now that all the wood was screwed together I took it to the trailer to make sure it was going to fit correctly and to see if I needed to make any adjustments to it. Then after I verified it would fit perfectly I used acrylic latex caulking to seal all the joints and make it look smooth (not to mention it reinforces it a bit).

6. After it sat up for an hour drying I then used 400 grit sand paper to smooth out all the edges and finally painted it (2 base coats of gray and one final coat of the left over gray with a little black spray paint sprayed on top of it to create a woodgrain look).
7. Finally, to make sure our shoes don't fall out while traveling to our destinations down bumpy roads I used a cheap Harbor Freight motorcycle mesh net to keep all our shoes in place by simply drilling three small holes in the top and three in the bottom to connect the 6 hooks of the mesh netting hangers to the shoe rack frame.

8. Now that it was ready for install, I installed it using six 90 degree metal corner braces attaching the frame of the shoe rack to the frame of the dinette seat and I used 1/2 inch wood screws to make sure they didn't protrude through the seat frame and damage the cushion.

9. Last of all, we filled it with shoes and have been using it happily ever since. I hope this helps others looking for a solution to the clutter and floor space.


Total Cost for Project $25.48 plus tax (I already had the paint and wood screws from a previous project so it is not included in the cost).
This was my dinette before the shoe rack, there was plenty of room to build one behind it (see pic below):
1. I bought 4 cedar fence pickets and cut 5 pieces roughly 28.25 inches long (my rows) and 2 pieces around 30 inches long (my two edge columns). Last of all I used the left over scraps to create my center column to make sure the boards didn't warp.
2. After cutting the pieces I used the two long pieces for the columns on the outer edges and the shorter pieces for the rows inside. I first placed all the parts together on a flat surface to be sure about how it looked and then I began drilling pilot holes on the outer frame and installed two wood screws connecting each corner together (wood screws).
3. Next, I installed the rows within the square frame I now had, creating 4 rows (3 boards in all) spaced roughly 7 inches apart from one another and then I drilled pilot holes through the columns to the horizontal boards and installed two screws in each side to support them.
4. I then installed the center support boards made out of the scraps I had left over installing two screws through the top of the shoe rack to connect the first and two screws in the bottom row board up through the center support (I can't emphasize enough, drill pilot holes or the wood will split). Once the first one was on I installed the rest in like manner with the exception of the top of each support (which you now can't drill into because there is a board on top), for the top of each one installed I drilled a single screw on the back side of the shoe rack that couldn't be seen making a pocket hole joint using a counter sink so it would sit flush (I don't have a jig and just did it by hand trying to hold it at a steady angle).
5. Now that all the wood was screwed together I took it to the trailer to make sure it was going to fit correctly and to see if I needed to make any adjustments to it. Then after I verified it would fit perfectly I used acrylic latex caulking to seal all the joints and make it look smooth (not to mention it reinforces it a bit).
6. After it sat up for an hour drying I then used 400 grit sand paper to smooth out all the edges and finally painted it (2 base coats of gray and one final coat of the left over gray with a little black spray paint sprayed on top of it to create a woodgrain look).
7. Finally, to make sure our shoes don't fall out while traveling to our destinations down bumpy roads I used a cheap Harbor Freight motorcycle mesh net to keep all our shoes in place by simply drilling three small holes in the top and three in the bottom to connect the 6 hooks of the mesh netting hangers to the shoe rack frame.
8. Now that it was ready for install, I installed it using six 90 degree metal corner braces attaching the frame of the shoe rack to the frame of the dinette seat and I used 1/2 inch wood screws to make sure they didn't protrude through the seat frame and damage the cushion.
9. Last of all, we filled it with shoes and have been using it happily ever since. I hope this helps others looking for a solution to the clutter and floor space.