A-Texan
RVF Regular
- Joined
- Jan 16, 2023
- Messages
- 76
- Location
- Texas
- RV Year
- 2022
- RV Make
- Gulfstream Kingsport Ultralite
- RV Model
- 199RK
- RV Length
- 23
- Fulltimer
- No
Well hello everyone, I just thought I would post this for any of those who bought a new travel trailer (like myself) and wanted to be able to disconnect the battery easily while storing it. I installed a battery isolator switch on my trailer because for some reason the propane detector on this new trailer was drawing a lot more power than my older trailers allowing it to discharge the battery over a few weeks or so (even with a small 30 watt solar charger connected to my 42 amp hour battery). To date I have increased my solar to 150 watt, but I still switch off the battery to isolate it while it is stored. Below is what I used when adding an isolator switch and upgrading my battery from a 42 amp hour battery (why do they even sale Travel Trailers with dinky 42 amp hour batteries ) to a 105 amp hour battery. Consider this trailer has an external battery (my first trailer had an internal battery bank, but this one has it outside by the propane tank). Everything was purchased through Amazon except the battery which I got from Batteries Plus.
Total Cost to Install Isolator Switch and 105 Amp Hour Battery w/case was $217.51 plus tax
1 Water Proof Battery Isolator Switch $13.99

1 Cable set 4AWG 3/8 lugs 2ft $19.98 (only used one cable - the other is for another project)

1 105 Amp Hour Battery $149.99

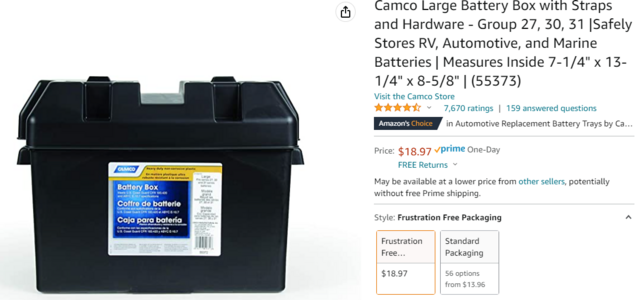
1 Large Camco 31 series battery case $18.97

1 pkg self-tapping screws (1 package of 100 - only used 4 screws to attach battery case to frame through the base) $7.43
1 tube Black RTV silicone $7.15

If you are doing this, just keep in mind you are doing it at your own risk, but this is how I did it for my trailer:
1. Took off the battery lid of the old 24 series battery box.

2. Disconnect the negative cable first, then the positive cable and remove the battery.
3. Remove two self tapping screws from the base of the old battery box and toss it away.
4. Install new battery box (if you are upgrading) using 4 self tapping screws inserted through the base of the trailer battery box to the frame on your trailer (angle iron support).
5. Install your battery.
6. Install your positive battery cable to the battery.
7. Take the upper cover of the battery box, set your Isolator Switch in position near the negative wire port and trace around it with a marker making a square.

8. Find the center of the square by measuring the length of the sides, marking the midpoints, and then making a vertical and horizontal line that cross dead center of your square.
9. Use a 2 inch hole saw to drill your hole placing the drill bit on the center of your square as marked previously near the cable outlet port for the negative cable and then mark ------your 4 bolt holes and drill them out too.
10. Place a thin bead of silicone around the base of the Battery Isolator Switch and then install it on the box using the 4 screws and 4 bolts that came with it and let it dry for -------an hour before installing.

11. Install the negative cable from the trailer to one of the terminals on the Battery Isolator Switch and tighten it up.
12. Install 2ft cable jumper purchased (black one) on the other terminal of the Battery Isolator Switch and then the other end of it to your battery negative terminal. Note: the 2ft cable from the switch to the negative battery terminal gives you plenty of room to maneuver the battery box off and on as needed in case you ever have to replace it.

13. Switch the Battery Isolator Switch On and Off to Check and make sure it is working properly. (if you want to OHM out the switch before you install to test it you can before -------installing, but considering it is such a simple device I bet it is made correctly, mine was).
14. Done, celebrate with a cold soft drink.
) to a 105 amp hour battery. Consider this trailer has an external battery (my first trailer had an internal battery bank, but this one has it outside by the propane tank). Everything was purchased through Amazon except the battery which I got from Batteries Plus.Total Cost to Install Isolator Switch and 105 Amp Hour Battery w/case was $217.51 plus tax
1 Water Proof Battery Isolator Switch $13.99
1 Cable set 4AWG 3/8 lugs 2ft $19.98 (only used one cable - the other is for another project)
1 105 Amp Hour Battery $149.99
1 Large Camco 31 series battery case $18.97
1 pkg self-tapping screws (1 package of 100 - only used 4 screws to attach battery case to frame through the base) $7.43
1 tube Black RTV silicone $7.15
If you are doing this, just keep in mind you are doing it at your own risk, but this is how I did it for my trailer:
1. Took off the battery lid of the old 24 series battery box.
2. Disconnect the negative cable first, then the positive cable and remove the battery.
3. Remove two self tapping screws from the base of the old battery box and toss it away.
4. Install new battery box (if you are upgrading) using 4 self tapping screws inserted through the base of the trailer battery box to the frame on your trailer (angle iron support).
5. Install your battery.
6. Install your positive battery cable to the battery.
7. Take the upper cover of the battery box, set your Isolator Switch in position near the negative wire port and trace around it with a marker making a square.
8. Find the center of the square by measuring the length of the sides, marking the midpoints, and then making a vertical and horizontal line that cross dead center of your square.
9. Use a 2 inch hole saw to drill your hole placing the drill bit on the center of your square as marked previously near the cable outlet port for the negative cable and then mark ------your 4 bolt holes and drill them out too.
10. Place a thin bead of silicone around the base of the Battery Isolator Switch and then install it on the box using the 4 screws and 4 bolts that came with it and let it dry for -------an hour before installing.
11. Install the negative cable from the trailer to one of the terminals on the Battery Isolator Switch and tighten it up.
12. Install 2ft cable jumper purchased (black one) on the other terminal of the Battery Isolator Switch and then the other end of it to your battery negative terminal. Note: the 2ft cable from the switch to the negative battery terminal gives you plenty of room to maneuver the battery box off and on as needed in case you ever have to replace it.
13. Switch the Battery Isolator Switch On and Off to Check and make sure it is working properly. (if you want to OHM out the switch before you install to test it you can before -------installing, but considering it is such a simple device I bet it is made correctly, mine was).
14. Done, celebrate with a cold soft drink.