Welcome to RVForums.com

  • Register now and join the discussion
  • Friendliest RV Community on the web
  • Modern site for PC's, Phones, Tablets - no 3rd party apps required
  • Ask questions, help others, review campgrounds
  • Get the most out of the RV Lifestyle
  • Invite everyone to RVForums.com and let's have fun
  • Commercial/Vendors welcome

Help - Ideas for Trimming Out Electrical

Welcome to RVForums.com

  • Register now and join the discussion
  • Modern secure site, no 3rd party apps required
  • Invite your friends and let's have fun
  • Commercial/Vendors welcome
  • Friendliest RV community on the web

syjsmom2

RVF Regular
Joined
May 10, 2020
Messages
25
Location
Shawnee KS
RV Year
2000
RV Make
Four Winds
RV Model
Chateau Sport
RV Length
28
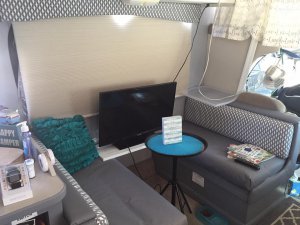
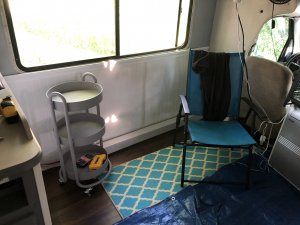
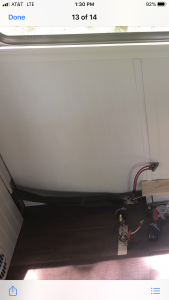
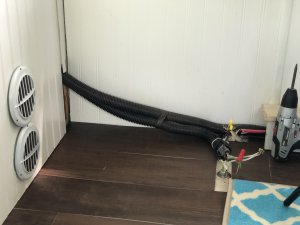
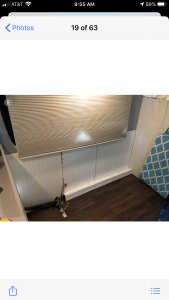
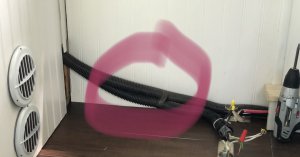
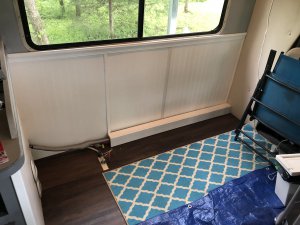
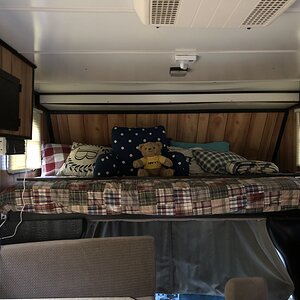
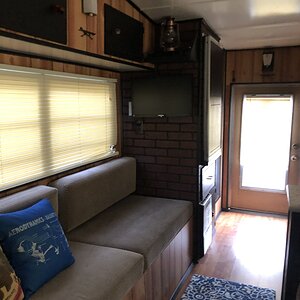
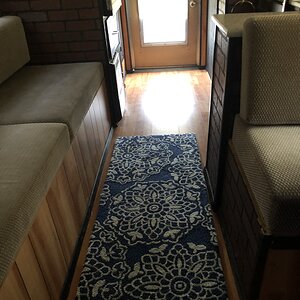
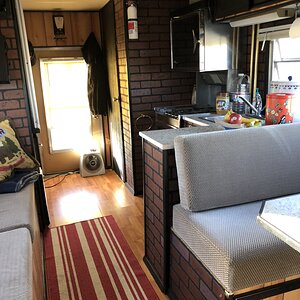
Trying to come up with a good easy way to trim this electrical in our rv. The wires running from cabinet are not moveable even to slide them to floor level and we are not going to try to splice and extend. We are relocating wires that are way out in the floor to line up with others along wall seam. We had a makeshift cover for right side, but decided to take out 2nd booth for more space. I’ve included before & after pics. The opening at cabinet is 8” tall and about 3” wide. Any suggestions? (Posting before pic with dinette & work in progress pic)
 

Attachments

  • 4A8C0274-2B2B-49F4-921C-B7F85AE11543.jpeg
    4A8C0274-2B2B-49F4-921C-B7F85AE11543.jpeg
    143.3 KB · Views: 34
  • BE5B16FE-C46D-4BD3-894F-1BA9B9AE9010.jpeg
    BE5B16FE-C46D-4BD3-894F-1BA9B9AE9010.jpeg
    2.8 MB · Views: 34
  • 05BAD42F-A946-426B-8696-A69F88FF3BD0.png
    05BAD42F-A946-426B-8696-A69F88FF3BD0.png
    7 MB · Views: 34
  • 4A0A10EA-0E85-4FC9-94ED-F94F25057CAD.jpeg
    4A0A10EA-0E85-4FC9-94ED-F94F25057CAD.jpeg
    2.1 MB · Views: 32
  • DA882C06-692E-4847-9129-5D6525E36848.png
    DA882C06-692E-4847-9129-5D6525E36848.png
    5.2 MB · Views: 30
I think you’re on the right path with that bulkhead on the floor. As I understand, the problem is those wires coming out from the left side, you can’t flex them to be at floor level so the bulkhead will eventually not be tall enough to conceal them.

assuming I understood that right, you could consider some decorative end pieces to that bulkhead which are taller and have a nice pattern on them. This is a common trick used when laying baseboard across flooring transitions with different heights. The idea is that you place a decorative block on each end of the bulkhead, really only for symmetry purposes. The block is also hollow just like the bulkhead but it’s much taller. Your cable goes behind that and the block is wide enough to cover the cable until it can be tucked behind the bulkhead.

i might also try to reduce the depth of that bulkhead if it were me. From how it looks in the pics, it’s just a few wires and it appears the bulkhead is at least 3” deep. You’d be surprised how much you’ll want that tiny amount of space back.

using the above approach and reducing the depth of the bulkhead, you can probably end up making it look like a high end, finished baseboard.
 
Last edited:
Thanks @MapNerd! I’m still not sure how to make that transition as the wires slope down. We did remove the black plastic covers and are replacing with much smaller cover over wires. Could you possibly find a picture of a decorative block? Would the rest of the trim have to be as tall as the slope of the wires coming down from the 8” height?
 

Attachments

  • 12A4809E-0D78-4002-A424-C3B7AFF38BA0.jpeg
    12A4809E-0D78-4002-A424-C3B7AFF38BA0.jpeg
    542.5 KB · Views: 8
If I understand that "stretching" or extending the wires is not an option, I would go for a taller bulkhead across the entire wall. I would suggest making it chair rail height or just under the window opening and capping it off with a ledge board wider than the bulkhead. This would provide a nice shelf for decorations or functional things like cold adult beverages. Then there is an empty void. There's no such thing allowed in the RV world! Make pocket shelves into this void above the wire chase.
1589208497343.png

1589213145953.png
 
Last edited:
@RandyB has a good thought on the same track as mine, though a bit more work it would be more useful. As for decorative wood blocks, here’s what a search a Lowes turns up: https://www.lowes.com/pl/Moulding-b...-blocks-Moulding-Moulding-millwork/1957013423. Most of these seem like they would work for concealing that corner. For any that are meant for crown mounding, just flip it upside down. Trim out some of the edge with a table or jig saw so that the wires can pass through to your bulkhead. Trim down your bulkhead to be just deeper than the opening you made in the side of the corner block and set its height just below where the decorative top of the corner block begins. Do the same on the other side with another corner block.

here’s a diagram. Obviously those corner blocks would not be squared off like that.
441E072D-9F18-45AA-B0C5-ADC81EC14DFC.jpeg
 
Last edited:
If I understand that "stretching" or extending the wires is not an option, I would go for a taller bulkhead across the entire wall. I would suggest making it chair rail height or just under the window opening and capping it off with a ledge board wider than the bulkhead. This would provide a nice shelf for decorations or functional things like cold adult beverages. Then there is an empty void. There's no such thing allowed in the RV world! Make pocket shelves into this void above the wire chase.View attachment 1967
View attachment 1968
@RandyB WOW! Thanks so much for the drawings - I’m blown away by the details and info both you and @MapNerd have provided! This forum rocks!
 
@RandyB has a good thought on the same track as mine, though a bit more work it would be more useful. As for decorative wood blocks, here’s what a search a Lowes turns up: https://www.lowes.com/pl/Moulding-b...-blocks-Moulding-Moulding-millwork/1957013423. Most of these seem like they would work for concealing that corner. For any that are meant for crown mounding, just flip it upside down. Trim out some of the edge with a table or jig saw so that the wires can pass through to your bulkhead. Trim down your bulkhead to be just deeper than the opening you made in the side of the corner block and set its height just below where the decorative top of the corner block begins. Do the same on the other side with another corner block.

here’s a diagram. Obviously those corner blocks would not be squared off like that.
View attachment 1975
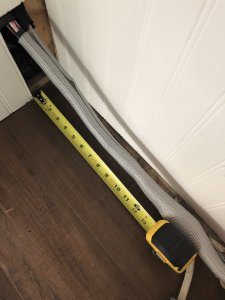
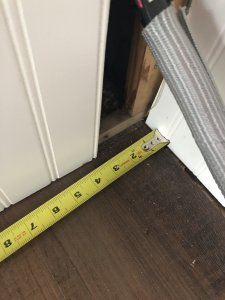
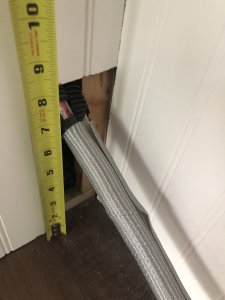
@MapNerd I missed this diagram! Thanks so much! Having a hard time finding premade block ends that Meet our measurement needs. Attaching pics with measuring tape. I think we need 3.75-4” deep, 9” tall x 7-8” wide.
 

Attachments

  • 53E4D885-69F3-436D-BAD2-8A1A568CBE6A.jpeg
    53E4D885-69F3-436D-BAD2-8A1A568CBE6A.jpeg
    1.5 MB · Views: 6
  • 44E65173-FC30-4164-817A-378366713951.jpeg
    44E65173-FC30-4164-817A-378366713951.jpeg
    1.3 MB · Views: 7
  • 93D255B2-CAEA-47EB-AED9-7DBBB1E7C6EE.jpeg
    93D255B2-CAEA-47EB-AED9-7DBBB1E7C6EE.jpeg
    1.3 MB · Views: 7
  • A8AF0023-D8C8-4B8D-BD7E-F469013E5A8B.jpeg
    A8AF0023-D8C8-4B8D-BD7E-F469013E5A8B.jpeg
    2.9 MB · Views: 7
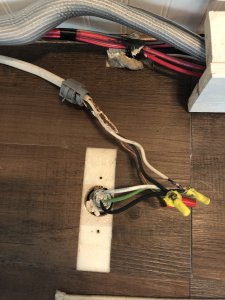
To add insult to injury, there isn’t enough give on the generator wires for my husband to move them against the wall - ugh! Now I’m going to have this sticking out in the middle of the floor? He’s going to put down vinyl flooring around it but not sure now how we’ll trim out wall to hide wires. Makes no sense why they couldn’t have put them in line with all the other wires. ?
 

Attachments

  • image.jpg
    image.jpg
    2.2 MB · Views: 10
wow I didn't realize it would be so tall. 9" is a lot. In this case, I'd probably go with @RandyB's approach. It's a little more work but not a ton and it will allow for better use of the space.

As for the flooring item, where do those wires coming out of the floor lead to underneath? Is it possible that you could pull them from under and relocate them? Also, if you ran with RandyB's diagram, maybe you'd just bump the whole thing out enough to cover those first two rows of flooring? A nice little built-in cocktail bar?
 
Very Interesting. Now, you've got a challenge. Based on the one photo (the latest one) it appears that the entry point through the floor is directly underneath. If it were me, I'd look underneath to see if the entry could be moved outboard towards the wall. I wouldn't hold much hope. As a secondary, I would be exploring cutting out a pathway in the flooring from the existing hole, towards the wall. It would have to be deep enough to bury the wires and also receive a piece of the flooring as a patch over the "trough".

The next problem is the wire nuts. By NEC (National Electric Code) there are several things to prevent you from this course. 1. All connections must be accessible, 2. Enough wire must be available for ease of device maintenance. So, in that case I would be underneath again exploring how I could a) pull more wire though and employ the trough method, or relocate the entry point into the floor.

Is it possible to extend the wires the other way? From the top down? It appears that the Romex above the floor is rather lengthy. Could a new hole be drilled through the floor, near the wall, then the Romex above the floor gets pushed down to below the floor. Meanwhile, the underfloor wire is retracted to all under the floor. A new junction box under the floor would be required for the proper connections. All assumptions based on no knowledge of what is below the floor.
 

Latest resources

Back
Top