This can be updated to “resolved” - couldn’t find a way to update from my end….
Update on the repairs.
First off, if you only need to change the door lock the washer does not need to be removed
")
Since Splendide sent a new control board, wiring harness, and door lock switch I was going to swap out all of them just in case.
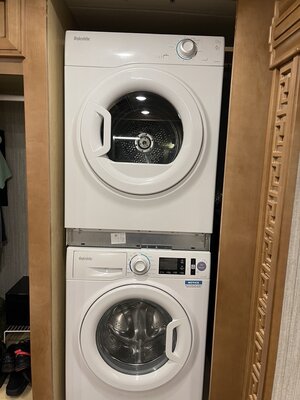
If you have the stacked washer and dryer in a closet you, most likely, will need to do the following:
1. Remove the doors from the cabinet - unfortunately they do not fit past the hinges.
2. Remove the bottom door latch catches since the washer needs to slide over those on the way out.
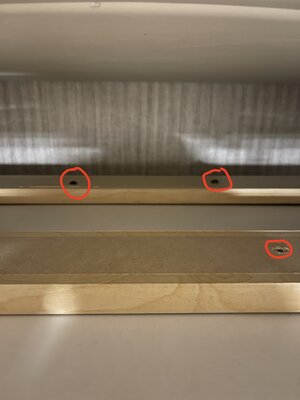
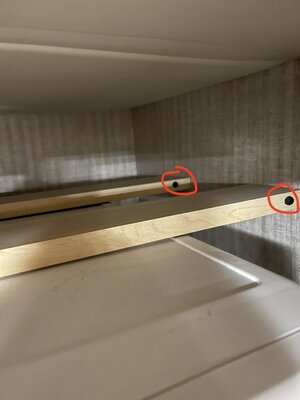
3. On top of the dryer you may find two boards - these are screwed to the top of the dryer as well as into the wall to keep everything secure once in place.
a. These are square head screws and you will need a stubby to get the ones going through the top of the board into the dryer.
b. Mark which board is which since the screw holes are not the same so you will need to line up the correct one in the front and the back when putting everything back.
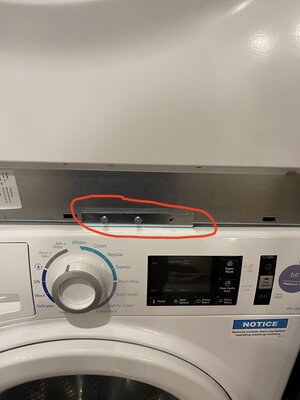
4. There are three screws in the front only holding the dryer to the bracket.
5. If yours is assembled like ours was, you will have to remove a tie wrap from the dryer vent hose where it is on the dryer outlet. Replaced with a normal dryer clamp when we put it back.
6. There are two brackets on the plastic pan that go around the front feet of the washer. Each of these has two screws that go through the bracket, plastic, and into the floor to keep everything secured on the bottom of the whole assembly.
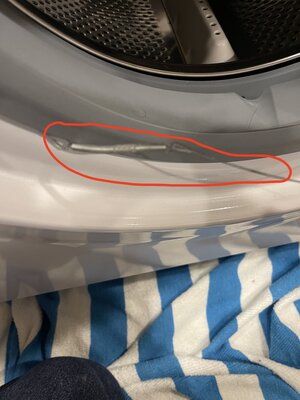
7. To get to the door lock switch you need to remove the rubber gasket where it connects to the front of the machine.
a. There is a wire and spring wrapped around to keep it in place.
b. You will need to find a spot where you can pull it away and get behind the front panel to where the door lock is.
c. Took a while to find the proper document - some of the older ones have screws holding it in place and newer ones have just plastic tabs.
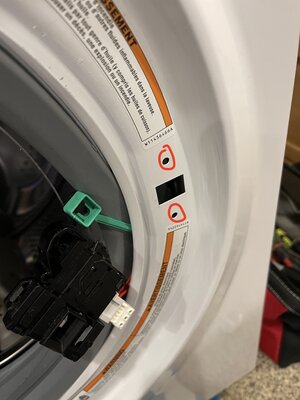
8. To remove the door lock reach inside and pull toward the opening slightly then push in with a little pressure on each of the two door lock round tabs.
9. Once out you can unplug the cable from the old switch.
a. The manual release (green portion in the pics) can be removed by turning the switch 90 degrees and pop out the green tab from the switch.
10. Assembly is the reverse to get the switch back in place after reconnecting the wire harness and the green manual door release.
11. When putting the rubber gasket and wire back in place make sure to look all the way around the opening to ensure it is all seated properly.
a. May need a small flat blade screwdriver to get the cable back in properly.
Couple observations and things to think about...
1. May want to mark the plastic pan before taking things out since it did take a while to get things aligned properly.
a. Need to align the bracket, holes in the plastic pan, and the original holes in the floor to anchor it down.
2. The hose connections did not have any plumbers tape on the valve side - they do now.
3. Decided that since the overall washer was working properly before the issue, kept the new control board and wiring harness for later just in case.
4. When putting the dryer back you will need to lift the front a bit to get the tab into the back of the dryer connecting to the bracket. Then it will slide into place so you can put the screws back into the front.
5. The wife came up with a good idea - brought a stack of paper bowls and a sharpie. Each of the sets of screws went into their own paper bowl which had the location written on the bottom. Made it much easier to keep everything together and find the correct ones when putting all back together.
Pics below that go with the above and particular items are circled. Let me know if there are any questions.