Welcome to RVForums.com

  • Register now and join the discussion
  • Friendliest RV Community on the web
  • Modern site for PC's, Phones, Tablets - no 3rd party apps required
  • Ask questions, help others, review campgrounds
  • Get the most out of the RV Lifestyle
  • Invite everyone to RVForums.com and let's have fun
  • Commercial/Vendors welcome

Aucta Willow support rail detached

Welcome to our community

  • Register now and join the discussion
  • Modern secure site, no 3rd party apps required
  • Invite your friends and let's have fun
  • Commercial/Vendors welcome
  • Friendliest RV community on the web

Skiddy

RVF Regular
Joined
Apr 9, 2026
Messages
7
Location
Delta, British Columbia
RV Year
2026
RV Make
inTech
RV Model
Aucta Willow
RV Length
26’
Fulltimer
No
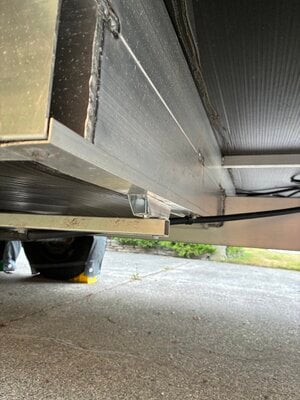
Noticed this rail hanging by virtue of the propane gas line. Second Photo shows the front end of the rail, the self tapping screw was never set to pull the rail flush with the cross frame support. There should have been a 1” spacer at the front end. I think this lack of spacer allowed the rail to vibrate and pulled out the next screw, first photo.
IMG_0113.jpeg
IMG_0112.jpeg
 
Okay! What does the rail do? Did you buy used?
 
So, it's a raceway for the propane hose. So it's a poorly engineered system. Reinforce as needed and move on.
 
Thanks, just what I’m doing. I’m pretty sure it’s an assembly error not poor engineering. Regardless, like you say move on.
 
I would offer that a fastener failure observed on my bought new 2026 Intech OVR Navigate camper sheds light on what happened to your Intech camper.

After the initial tow home from the at-dealer purchase, the electric brake lanyard pull switch assembly came off in my hand as I stowed the trailer.

The head of the power tool driven self-drilling screw had separated from the shank, at zero force imposed on it, from just the wiggling during lanyard stow.. The shank, however, was stuck fast and not easily removed from the aluminum frame. I opted to drill a new pilot hole nearby and secure the lanyard pull switch body back onto the frame using a skirted metal roofing screw, installed by hand via ratchet wrench and socket, so as to not tighten it to where the lanyard switch was hard pinned, or the head of the screw wrung off.

Looking at your photos, two screws that were originally secured that piece to the frame have their heads separated. The shanks are there, as "stuck studs", same as what I saw on the OVR.

Also, there is a visible contact print where that hose support piece was originally in firm contact with the frame before the two fasteners separated.

The screws did not pull out. You don't need a spacer. You experienced a separation of the head from the shank at two fasteners that were overstressed at the factory by the driver tool that installed them. One of the heads still has a bit of shank remnant on it, so it stayed in place at the surface of the piece that it no longer secures.

Intech is inadvertently overstressing some of the self drilling screws during install/build. Probably a chinese low strength screw supply choice problem.

They did not yet get told about the failure on my OVR, as I regarded it as a one-off. They don't know about your overstressed fastener faiure either, so unfortunately, more of us customers will experience the after effects of random factory-overstressed self drilling fasteners by having some fail.

I had a problem with the stairs and Intec generated a service bulletin and new part in less than 30 days after I asked for a fix. We owners should let the factory know about these fastener failures.

 
Its a shame that you need to redo this but if you do it it will be better than what the dealer would do. the dealer might sit on it for a month
 
Hello @MNC

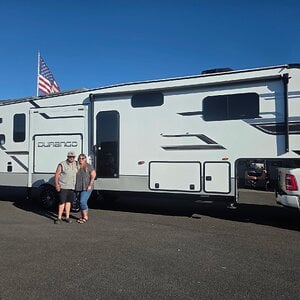
Please reply to this showing us a picture of you with your RV. We'd love to learn more about you.
 
All that needs done is to back those nice long remnant screw shanks out using vise grips, unscrew that one lingering head that used to be attached to one of those separated shanks to free its two or three thread attached remnant, get the same size and grip length self tapping screws from Ace Hardware and re-install the new screws through the original holes.

Put the screws in using your 1/4" drive ratchet handle and push though carefully by feel if either screw is tight going in. Remember that the contact marks where the piece was previously against the frame means no spacer was used or would be needed when it is fastened up correctly.

My dealer is great, but is 120 miles away. No reason to take it back for just piddlin' stuff that is needing fixed. If crawling under isn't your favorite thing, ask a buddy to help..
 
Thanks for the comments and suggestions. The rail in question is attached to the trailer in three locations, two into crossmembers spanning the width of the box frame and the one at the front end directly to the box frame. That front screw is the 1” thickness of a cross member further from the ground than the other two screws. The tubing could be forced to conform which I think is what inTech did, but in my opinion it’s best to let it lie straight with all attachment fasteners in the same plane. I had some tubing left over (from mounting a sewer hose carrier) and once on the same plane, the self tapping screws pulled everything together nicely.
The other screws that had worked loose or had sheared heads were replaced with a larger size.
 

Attachments

  • IMG_0125.jpeg
    IMG_0125.jpeg
    3.7 MB · Views: 0
You did great. Thanks for the informative after action report!
 

Latest resources

Back
Top Bottom