The process....
If you are replacing with batteries that have similar dimensions you may be able to reuse (after cleaning) the existing connectors. Otherwise having cable, cutter, crimper, and terminal ends would be needed in prep. Paint if you need to touch up the tray, etc...
Take pictures. Make sure you identify the component wires. There may be a decal on the bay wall that shows the connections.
Here's a hit list.
1) Series connections... + to -
2) Parallel connections. + to + to + to +, and - to - to - to -
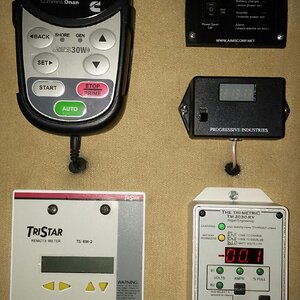
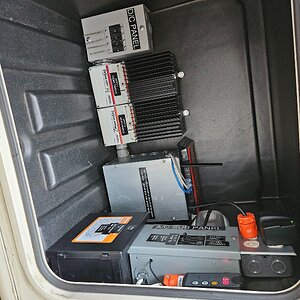
3) ME-TP temp sensor for Magnum Inverter
3) Inverter Pos. and Neg.
4) House Positive and Negative (bundled)
5) Frame grounding connector
6) bi- directional relay
7) identify the catastrophic fuses.... one big T-fuse for the Inverter (350A?) and one for the House (150 - 175A?)
CAUTION!!!!!!!
When working with batteries you have multiple hazards to be wary of...
Hydrogen gas... accidental grounding.... and not knowing what you don't know.
You will have to be EXTREMELY careful with the bi-directional relay. If it is completing the circuit to your chassis batteries and you carelessly take the positive cable off and accidentally touch it to something,..,.,you will begin arc welding... and it is the one thing that does NOT have a catastrophic fuse to save the day.
Inside prep...
TO prepare...
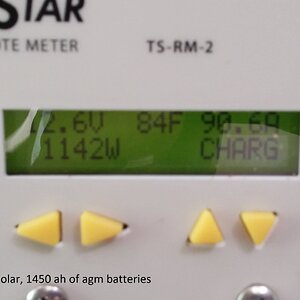
check the digi-level HOUSE voltage and Chassis voltage. If they are the same, and above 12.8v... like 13.3 +/- .,.. they are connected. Stop...disconnect all AC power sources, and make sure engine is off. We really don't want to proceed with the bi-directional relay tied. IF the voltages are separate...then no worries.
If you don't have anything to keep refrigerated...then just leave the AC power (Shore/Generator) off. If you do have refrigerated items... You can keep the fridge on...but establish this carefully.
1). While batteries are still connected...reestablish shore power. Check the fridge light is on when you open the fridge door. Okay...it's got power. Now give it a second to establish pass thru... At the magnum remote, press the soft key for CHG (charger)....and the soft key for INV (inverter). Now to see if "Pass thru" was established...go check the light inside the fridge again,. If it is still on it will continue to operate as long as AC power isn't interrupted. You cannot reestablish it if it's lost without having both AC and DC to the inverter, which will be impossible once you've disconnected the Inverter from the batteries. You will loose all lighting inside, other than the microwave light (if pass thru is established), And the map lights over the driver and passenger seats.. ( Chassis Powered). USE Saleman switch to disconnect many of the house loads. This is only to make less spark when disconnecting terminals.
cardboard is handy to make sure you don't short out terminals, or a piece of foam. Consider wrapping metal tools to lessen accidental shorting. Wear safety equipment. Rubber shoes, protective glasses, etc...gloves...
IMPORTANT! The traditional wisdom when working with automotive equipment is to disconnect the grounds. STOP!!! Your coach has an exception to this. The first thing to remove is actually the INVERTER POSITIVE +++++. Our Magnum Inverter did not isolate grounds...so, If you remove the Ground from the Inverter with the Postive lead still connected "IT MAY SEEK ALTERNATE PATH TO GROUND THRU SENSITIVE PERIPHERAL DEVICES AND DAMAGE THEM". So, if you don't...you might fry the microprocessor in the ME-AGS, or ME-BMK if installed.
He's a good order...
And WHEN YOU REMOVE the Positives from the INVERTER, HOUSE, and BI-DIRECIONAL RELAY. Wrap the metal ends securely with electrical tape, and don't just let them flop around where they may touch metal.
1) Inverter Positive.
2)Inverter GND
3)House GND
4)Chassis GND
5)House POS
6)BI-DIRECTIONAL RELAY POS
7)TEMP PROBE
8)SERIES JUMPERS x4
9)PARALLEL JUMPERS x 6
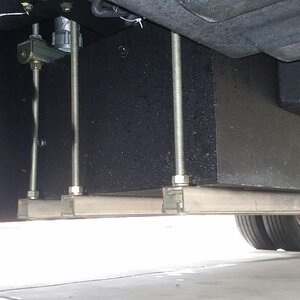
Remove straps
Remove batteries
Remove tray
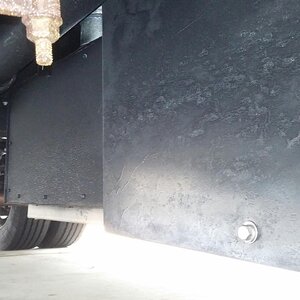
Clean Bay and allow to dry
Clean Tray an allow to dry
Clean straps and allow to dry
Clean all terminal ends. Still use caution with the Bi-directional relay isolator... It shouldn't be connected...but just to make sure.
When dry...touch up paint in bays..
NOW. just reverse what you did with the new batteries once the tray is reinstalled and everything is ready to go.
DOUBLE AND TRIPLE CHECK each connection as you make it. No room for oooppsies.
Take you photo and methodically check it for completion of work done.
Inside...
Press SALEMAN SWICH. Lights should work. Check you digi-level for HOUSE voltage
")
If shore power is available... Press CHG...see that charger comes on. NOTE: IF you changed to a different brand of battery, you may need to update charge parameters.
Press INV...if you want the inverter to take over in the absence of shore power/generator power. To keep fridge running on the road, etc...
... Make sure everything is back in working order ready for the next TRIP.
 Blessings