Welcome to RVForums.com

  • Register now and join the discussion
  • Friendliest RV Community on the web
  • Modern site for PC's, Phones, Tablets - no 3rd party apps required
  • Ask questions, help others, review campgrounds
  • Get the most out of the RV Lifestyle
  • Invite everyone to RVForums.com and let's have fun
  • Commercial/Vendors welcome

Fender completely ripped off

Welcome to RVForums.com

  • Register now and join the discussion
  • Modern secure site, no 3rd party apps required
  • Invite your friends and let's have fun
  • Commercial/Vendors welcome
  • Friendliest RV community on the web
That gash will require some actual bodywork. I suggest using fiberglass "gel" instead of resin. Resin is awful on vertical surfaces, it always wants to drip down. Gel (any parts store) on application doesn't sag on application and acts more like body filler. It doesn't penetrate fiber cloth as well as resin though, an important consideration for repairs that are more structural than just cosmetic. For the fine finish work you will want to use some actual body filler on top of your fiberglass, so leave the fiberglass dished in just a tiny bit. You can sand it back if needed.
I've seen where Bondo (at least) now sells small tubes of their filler and some activator just for small repairs. If that single gash is all you need to fix one or two of those might be better than buying a big can. Cans will go "bad" over a long time.
You can use glass beads to thicken the epoxy, rather than buying several products.

For the record! I would use a decal of a bandage over the damage!
Using balloon font have an oops with the amount saved by purchasing a damaged RV!!! but that's me!!!
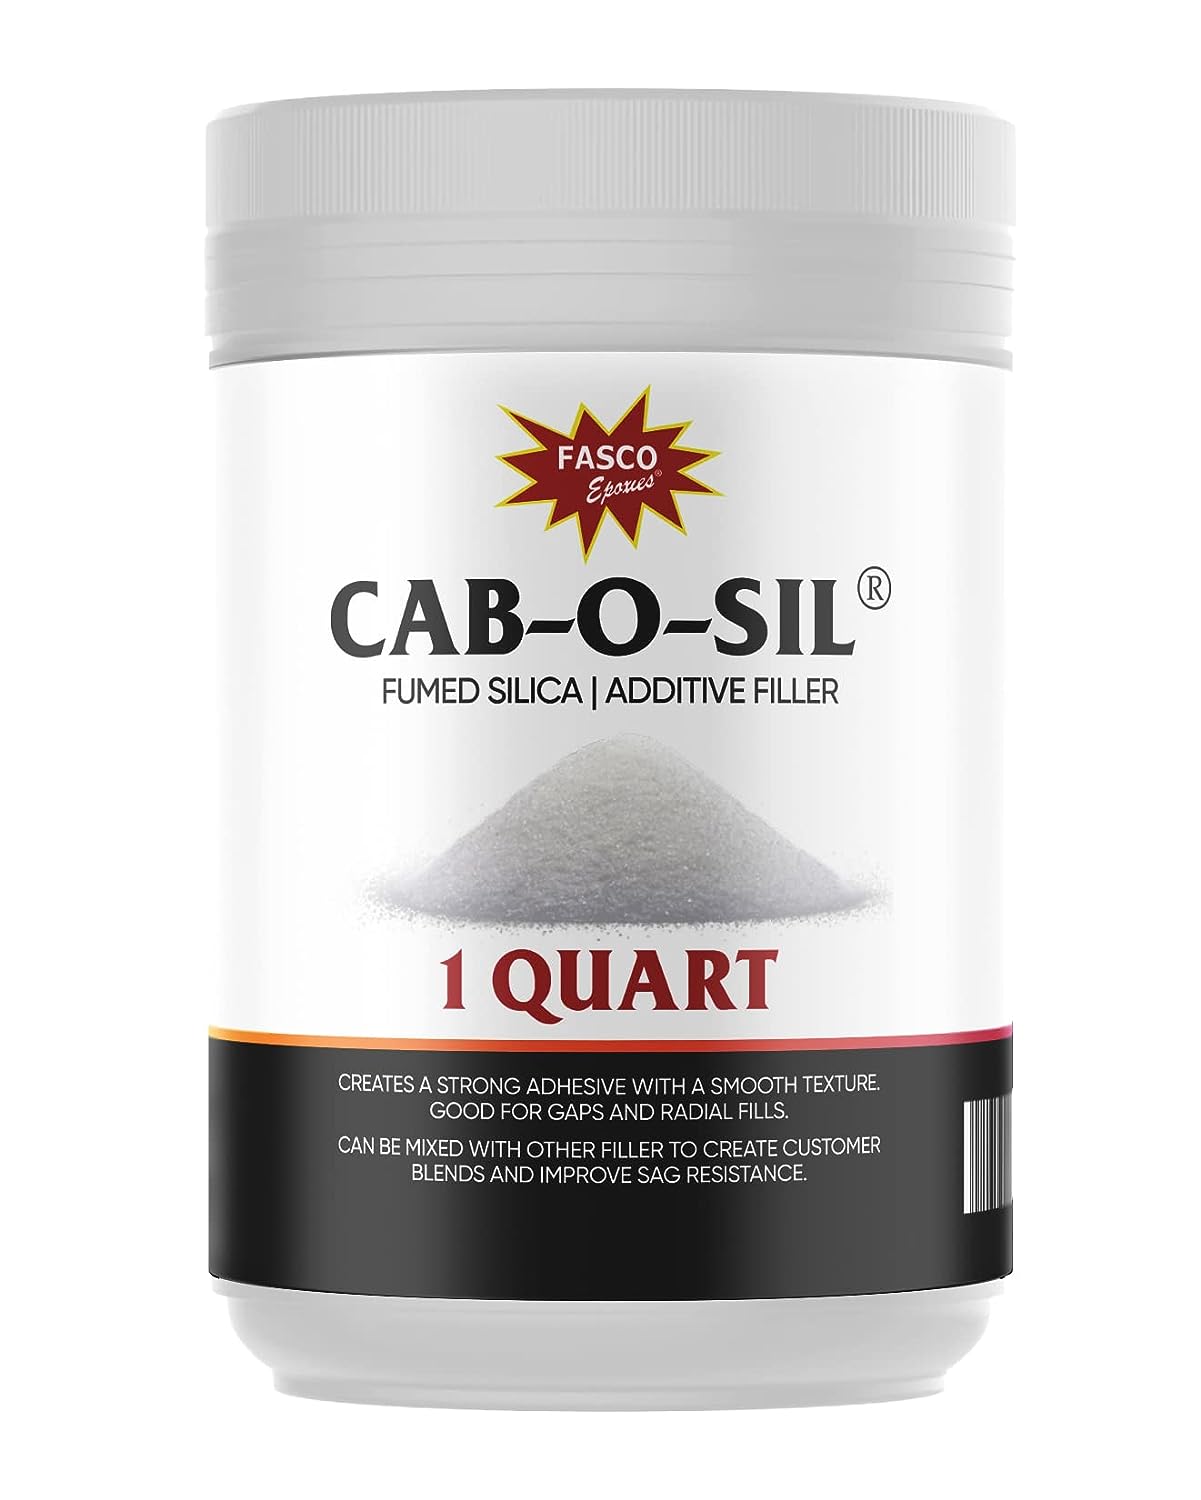
 
You can use glass beads to thicken the epoxy, rather than buying several products.
Glass beads? Not sure I'd want any silica in a body filler. I have glass bead in my blasting cabinet, you mean that stuff? I don't refer to fiberglass resin as epoxy but I think that's what you are referring to. I like to add fiberglass resin to body filler to "thin" it which makes it easier to lay out a skim coat.
I actually like having several products myself. Good Evercoat filler, cheap Bondo filler, spot fix fillers as mentioned above, fiber gel, fiber resin, 2 part glazing putty, and one part glazing putty. I'm not a pro body guy, just kind of big on having the right tools and supplies for repair jobs.
I get that!!! Bondo and other polyester products aren't the right product when contact with foam is possible!


This website will have all the supplies needed for the job. Haven't spent much time looking around, but they may also have how to literature!

If not west systems will!
 
Ok for that gash, You would take the flap wheel and clean up the whole area almost up to the stripe. Make a bevel around the cracks. Can you get behind that damage? Let's assume you can't. cut 4 layers of random direction fiberglass (HomeDepot) that are progressively larger. The smallest fits into the cracks in the hole. Just brush some activated resin all around and in the depression (that's not a hole...because there is material there you can use to support the wet fiberglass)...then place the smallest piece of glass in the depression. More resin till the glass is near clear. Then another layer. Finally the last two pieces are larger than the cracked area and into the depression you ground. Let it all dry. Flap wheel it flat. Use body plastic (not Duraglass) to smooth it all out. Switch to flat sandpaper (60 then 100 then 200 then 400 grit as all gets level and smooth) on a sandpaper block (to unsure it's flat). You will need multiple coats of body plastic.

Use spot putty and skim coat to fill pinholes. Dry. Wet sand with 400.
prime, sand, paint, clear coat larger than damage area to blend.

if you don't have paint equipment, you might want to bring the prepared RV to a body shop and let them do that.
Great Response. It's not your first rabbit hunt I can tell that.
 
A step that wasn't documented: use PrepSol around entire area before any sanding or grinding to remove oil / wax. Then put blue tape around the areas that you are not sanding to protect against possible resin drips / inadvertent sanding strokes. On the bottom tape, leave the bottom proud of the surface to act as a "ramp" for spills. And only use enough resin to get absorbed into the cloth (which can take a few minutes so have some patience without too much that it starts tacking up.)

At this point, this stuff is second nature so steps are forgotten :)
 
I get that!!! Bondo and other polyester products aren't the right product when contact with foam is possible!
Well, I learned something today. Thank you! Had to look up "fumed silica". One of it's purposes is as a very light abrasive. Still kind of throws me, as body filler is what I want to use silica based abrasives ON. I picture trying to sand sandpaper with sandpaper. I realize it's not like that and this is obviously a product people use in this manner. Think I'll stick with the fiberglass gel though. :)
 
@DavidL , @Kevin D Pem , @GypsyR ,
Thank you all for that wealth of info. I'm not quite ready to tackle that project, but do know that I started reading these responses in anticipation. Very good info! Would like to get product ordered and available for when I'm ready for that one. If I have further questions, I'll probably start a new thread for it.

For the record! I would use a decal of a bandage over the damage!
Indeed!
I am likewise not opposed to that, as you can see by my motorcycle I took a fall on. And yes, that hurt!
Motorcycle2.jpg
 

Latest resources

Back
Top