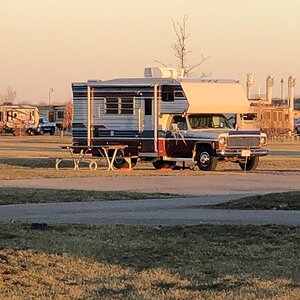
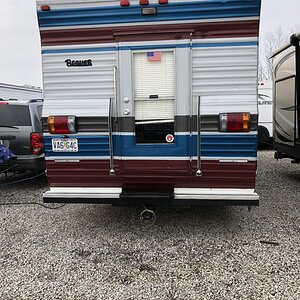
One of our fenders completely ripped off. Would like to know a relatively easy approach to get this back on.
It's a 2005, so it doesn't need to be a polished solution.
Question: I noticed my thread got moved to the "Fleetwood" forum.
I'm curious to know why. When my question seems unique to Fleetwood, I post it there.
But I feel like this is generic enough that I'd like to hear from a wider audience, not just Fleetwood owners.
Perhaps others have found a good way to get a fender back on, regardless of what type of RV it is.
One of our fenders completely ripped off. Would like to know a relatively easy approach to get this back on.
It's a 2005, so it doesn't need to be a polished solution.
I think I would try to superglue it back on to the tabs. Just to make sure they are in the correct position. Then remove it all and work on it from the backside. Superglue by itself isn't that strong so you'd want to just loosen all the screws first. In any case one or two tabs might not stick. Put them back on later.
The real repair would be on the backside. Lately it's been a 50/50 shot whether epoxy works on such issues for me. Not real thrilled with that. I've been using superglue and graphite for some things. Superglue and baking soda for others. It's surprisingly strong and when you use the glue with various powders it basically sets instantly. Like we always wished superglue would. For more details and examples there are bunches of how-to videos on Youtube. One latest one I saw they were using it with cement. You can do some pretty slick repairs with it but each and every one tends to be pretty ugly. Hence doing the work on the back as much as possible.
I think I would try to superglue it back on to the tabs. Just to make sure they are in the correct position. Then remove it all and work on it from the backside.
That was good advice! Trying to line the broken pieces up after taking them off would be problematic.
I'll temporarily tape the whole fender on for placement, then superglue, then remove everything and work from the backside.
Thank you!
One of our fenders completely ripped off. Would like to know a relatively easy approach to get this back on.
It's a 2005, so it doesn't need to be a polished solution.
For some reason I can get the link to paste. But I have had a lot of luck with this product.
Super CA Glue (2 x 4.5 oz.) with Spray Adhesive Activator (2 x 16.9 fl oz.) Ca Glue with Activator for Wood, Plastic, Metal, Leather, Ceramic - Cyanoacrylate Glue for Crafting&Building (2 Pk) (amazon of course)
So I had an issue similar to this with my motorhome rear cap. I made come small aluminum "U" clips that extended past both dies of the broken tab and fiberglass resin glued the clips and the broken tab together and then slipped them back on to the main part of the fender glue and riveted them in place and re mounted the fender then overlaid with fiberglass cloth and painted. Pictures show the result. There was much more to this project as I actually pulled the entire endcap off the RV. The top corner shown in the picture was torn off and I reattached glassed and painted. AS you can see I pulled every screw through the glass so it was quite a project.
This site uses cookies to help personalise content, tailor your experience and to keep you logged in if you register.
By continuing to use this site, you are consenting to our use of cookies.

")