Welcome to RVForums.com

  • Register now and join the discussion
  • Friendliest RV Community on the web
  • Modern site for PC's, Phones, Tablets - no 3rd party apps required
  • Ask questions, help others, review campgrounds
  • Get the most out of the RV Lifestyle
  • Invite everyone to RVForums.com and let's have fun
  • Commercial/Vendors welcome

Newmar / K2 Spartan air bag replacement

Welcome to RVForums.com

  • Register now and join the discussion
  • Modern secure site, no 3rd party apps required
  • Invite your friends and let's have fun
  • Commercial/Vendors welcome
  • Friendliest RV community on the web
Nice - was Blacktech OE or the result of research?
 
Nice - was Blacktech OE or the result of research?
Cross reference.
so, on that topic, for others where it may apply here are the part numbers. This has taken quite a bit of research and some trials / error. The underline are the numbers I am using:
2002 Newmar Mountain Air 4370 K2 500HP:

Front Bag: 700136-01 crosses to W01-358-9825
Front Shock: 90 2815 485-02-2815 Red Diamond crosses to Koni 13708643

Rear Bag: 12884-01 crosses to 1T15M6 W01-358-9223
Rear Shock: Spartan 0346-SS5 Bilstein: 24-015943

Tag Bag: AS-9070 crosses to W01-358-9070
Tag shock: 85029 crosses to Bilstein: 24-186414
 
Last edited:
Here is a pic of the wheels going to get new skins. And of course as soon as I got there, the Manager advises they polish Alcoa wheels for $85 each (he showed me an example - better than new) and powder coat wheels for $35. Geees, should have found out those prices before doing all that work. And theirs would have come out much nicer.

I power washed, then acid cleaned (big difference), wet sanded, and then polished the wheels myself. Certainly much nicer than they were, but not as nice as the example shown. They sand blast all wheels all over first, then polish (or powder coat).

Put 10 oz of balance beads in each wheel and used the special filter equipped valve. New stems on all. Paid $14 to get rid of the old tires. Purchased the new Michelin 275/80/22.5 G on the FMCA discount program.

2 1/2 hrs door to door done.
Shrader Tire and Oil, Burton Mich, ask for Matt (nice guy)

Also the new tag bilstein shocks came in - installed them.
And the new tag air bags came in - installed them.

All went smoothly. The only hickup was the air bags didn't come with a bolt to hold the new air bag aluminum base to the bag. I used the old bag bolt. But, that also means that they weren't "clocked" from the air bag factory. So, I had to lightly snug the bolt, assemble all, line up all holes, sharpie mark the rotation where the bag isn't under torsional stress, lift the bottom of the air bag and tighten the central bolt tight tight. Then was able to bolt the air bag base to the control arm pad.

So, next step is clean up the wheel attachment nuts, chrome hubcaps and nut covers. I bought some wheel gaskets to go in-between drum / wheel and in-between rear inner and outer wheels to keep the alloys from oxidizing together.

After the wheels are on, I'll drop the rear off the stands and start on the front end!
 

Attachments

  • Wheel_trailer.jpg
    Wheel_trailer.jpg
    271.6 KB · Views: 3
So, Today is clean up the chrome stuff and put the wheels back on. You might know first hand that cleaning the nut covers is a tedious endeavor. So, came up with a rig that made it a 30 minutes affair. The end is a 3/4" drive to 1/2" drive adapter that happens to fit nicely in the inside of the nut covers. So it's very easy to spin the covers while applying a rag of polish on the end. You can see on one side those that are dirty, and those that are polished.

Cleaned the hub cap / bonnets using a standard foam polishing pad by putting the caps on a soft cloth and using my foot to keep it from skittering across the shop floor while polishing. One of my caps is beyond polishing....had to wire wheel off the rust and it's just a matter of time before it's covered in rust again, but good enough for now until I find an inexpensive source for caps.

Also, since my knee is not quite up to snuff (surgery in a few weeks), I had to come up with a way to mount the heavy wheels without overly stressing the bod. A few scrap 2x4s to the rescue. The width for my tires ended up being 16 1/2" inside measurement. The long lever boards are 24" long. You could make them 36" if you need more leverage. This made the wheel alignment and lift easy peasy.

So, used a 1/2" air impact to snug the wheels on.

Tires all back on and I realized I forgot to grease the underbody....so need to put some stand back underneath and be thorough...
 

Attachments

  • LugCleaner.jpg
    LugCleaner.jpg
    268.7 KB · Views: 2
  • TireLift.jpg
    TireLift.jpg
    266.8 KB · Views: 3
So, Today is clean up the chrome stuff and put the wheels back on. You might know first hand that cleaning the nut covers is a tedious endeavor. So, came up with a rig that made it a 30 minutes affair. The end is a 3/4" drive to 1/2" drive adapter that happens to fit nicely in the inside of the nut covers. So it's very easy to spin the covers while applying a rag of polish on the end. You can see on one side those that are dirty, and those that are polished.

Cleaned the hub cap / bonnets using a standard foam polishing pad by putting the caps on a soft cloth and using my foot to keep it from skittering across the shop floor while polishing. One of my caps is beyond polishing....had to wire wheel off the rust and it's just a matter of time before it's covered in rust again, but good enough for now until I find an inexpensive source for caps.

Also, since my knee is not quite up to snuff (surgery in a few weeks), I had to come up with a way to mount the heavy wheels without overly stressing the bod. A few scrap 2x4s to the rescue. The width for my tires ended up being 16 1/2" inside measurement. The long lever boards are 24" long. You could make them 36" if you need more leverage. This made the wheel alignment and lift easy peasy.

So, used a 1/2" air impact to snug the wheels on.

Tires all back on and I realized I forgot to grease the underbody....so need to put some stand back underneath and be thorough...
Progress! Also nice work-saver ideas. My little job today is mirror adjustment (shower valve was yesterday). Covid put travel plans on hold so I’m just doing a small project each day.
 
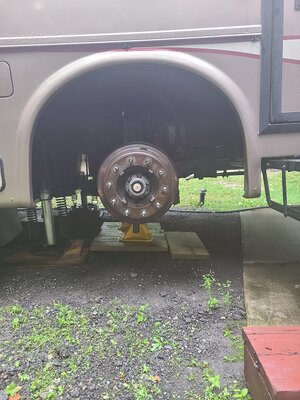
So, Put the Jack Stands back into place and shimmied under again and greased up the prop shaft and brakes. Lowered the rear end back on the tires. Tomorrow I will torque and give a final cleaning.

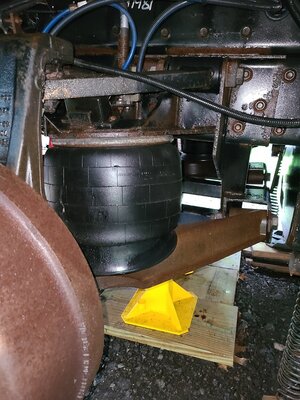
I also lifted the front end, put stands underneath, powerwashed to inspect. Initial look at air bags they look good (see pic). Will look closer tomorrow.

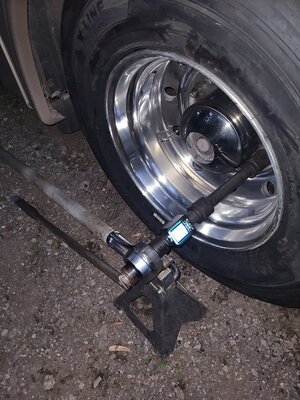
I did clean up the front lug nuts with my "invention" so I could put that stuff away.

Tomorrow I will at least grease the front end and inspect the lower ball joints.
 

Attachments

  • FrontBag.jpg
    FrontBag.jpg
    235.1 KB · Views: 3
  • FrontWheel.jpg
    FrontWheel.jpg
    219.5 KB · Views: 4
This is inspiring. I’ve gotten a little lazy about chassis maintenance and instead have chosen to have Sacramento Freightliner do some of the work that I used to do myself. I still do a lot of work on the coach but not as much as I could.
 
Inspected Front Bags. Look in excellent condition. No need to replace them. But they look easy enough to replace. Much easier access than the rears (especially the Tags). Greased all suspension and steering and brake lube points. Inspected everything underside.

Polished front wheels, put them back on, pulled the jack stands and put the RV on it's tires. Started the motor and it all aired up nicely. I have it running for a bit to get all things warmed up for an inspection.

Next: tighten 60 lug nuts to 450ftlbs....

Now that the engine is running, I am feeling hot air coming out of the Dash...ok, settings are on full hot, so that's a good thing. Turned on AC full. Still warm....opened up the motor lid and 10 seconds later...anyone see why my Dash Air isn't getting cold? Someone messing with my rig....to be continued in an A/C thread...
 

Attachments

  • ACOpen.jpg
    ACOpen.jpg
    189.3 KB · Views: 5
Last edited:
I don’t think that could just happen, and it’s probably not squirrels…

I was wondering what you use to get to 450ft/lbs?
 
1693782625423.png
 

Latest resources

Back
Top