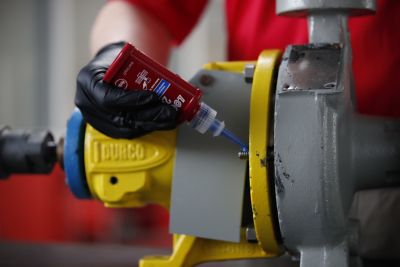
After owning Newmar motor homes for 25 years with 2 London Aires and Essex we have learned a lot about slide out motors and the bolts that come loose. Good You Tube video on how to check slide out motor bolts and how to improve the attaching of these bolts to the slide out assembly.
@tomchelbana I see you posted the YouTube link in your profile area and not this thread. It's an incorrect link so I found it and am sharing below. I removed the errant post from your profile area.
This is the email I received from Erica regarding the torque values.
Jim,
Here is the information on checking for the proper torque of all mounting bolts on all electric slideout motors. If any bolt is undertorqued, remove the bolt, and add blue LOCTITE® thread sealant to the bolt threads. If there is no washer on the nut side of the bolt, add a flat washer. Reinstall and torque all 5/16” bolts to 19 ft. lbs. and all 3/8” bolts to 33
ft. lbs.
Erica A. Miller
Ventana Brand Specialist
1-800-731-8300
This video got me in there tightening bolts, and while they were not falling out, they weren't tight either. Also no use of standard or lock washers. Im going to replace them all with 1/4” longer bolts and washers. Given the application, I can‘t understand this oversight.
The other benefit of doing this is that it gets you in there checking stuff. I have several collars with set screws loose and floating around back and forth on the shaft and clearly they are meant to be secured with the set screw in a slot on the shaft.
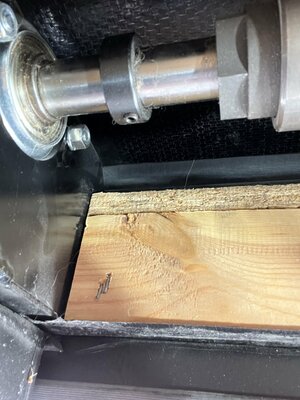
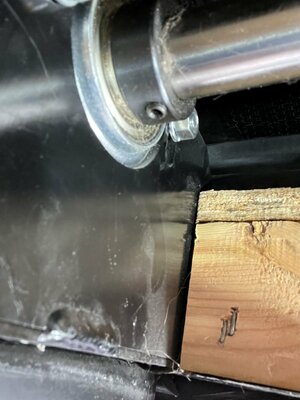
And last but not least, I finally got all the debris out from damage caused by the practice of piecing material together during construction rafher than using continuous stock. I’ll let the pics explain that. I noticed this issue when I started finding aluminum shavings in the compartment that looked like left over debris from the build, but turned out to be a bit more serious.
I noticed that no torquing was done in the video. I have a torque wrench, but never got Tito work. Do you all torque these screws, or just snug them down?
I noticed that no torquing was done in the video. I have a torque wrench, but never got Tito work. Do you all torque these screws, or just snug them down?
I think most snug them. At the end of my first year I asked Newmar to check mine. He pulled out a crescent wrench and snug checked one motor and we stopped there. I was a bit surprised a torque wrench was not used. I check mine annually, the only one that has a bolt that likes to slightly loosen is the bedroom slide. Next check I'll loctite it. Also people should look at the different loctite variants (numbers) and understand what they are using. Even in @tomchelbana's YouTube video his two red bottles are different types of loctite, notice the different numbers.
I dont bother with a torque wrench for anything spec’d under about 40lbft unless its in inch pounds and really matters. I take bolt size and the material its treaded in into consideration and make it tight enough without braking anything. But Ive been wrenching for almost 50 years.
If you have any doubt use a good click-type torque wrench and not some Chinese knock off from Harbor Freight. They can easily over-torque and break bolts which would create another unpleasant chore. But “good and firm” with an end wrench (never a crescent wrench…wow!) with red locktite should do the job.
I also found several of the collars I mentioned above loose and floating on the shaft. Not sure they are critical but they are there for a reason so one more thing to check (see pics).
I don't bother with the torque wrench either. It's an annual job and will also treat with blue loctite next time. For me it's a good job to do the bedroom slide when it rains.
its also a good reason to get in there and poke around and make sure everything else is on order. Thats how I found the damage in post #7 and the loose collars in post #11.
Yesterday I decided to check slide motor bolts for the bedroom slide. Last time I did it was 5 years ago. Found them loose. Lucky there was no damage. Backed them out, used Locktite and tighten them “Gut,ntight”.
While there, vacuumed all around and tightened every fasteners I can see.
Now I found out AC #3 does not blow cold air. Here we go on the roof again
This site uses cookies to help personalise content, tailor your experience and to keep you logged in if you register.
By continuing to use this site, you are consenting to our use of cookies.