Welcome to RVForums.com

  • Register now and join the discussion
  • Friendliest RV Community on the web
  • Modern site for PC's, Phones, Tablets - no 3rd party apps required
  • Ask questions, help others, review campgrounds
  • Get the most out of the RV Lifestyle
  • Invite everyone to RVForums.com and let's have fun
  • Commercial/Vendors welcome

Problem Round 2. ding ding

Welcome to RVForums.com

  • Register now and join the discussion
  • Modern secure site, no 3rd party apps required
  • Invite your friends and let's have fun
  • Commercial/Vendors welcome
  • Friendliest RV community on the web
Think I'm going to clean that up and try JB Weld along with the Stage8 hardware. If it won't work, I'll have to pay the price. Has anyone here replaced that gearbox? I'd like to know what I'm getting into.
 
It’s an easy replacement. Be sure to torque the thrust bushing to the proper manufacturers spec. though. Torque wrench with a stubby open end wrench adapter needed.
 
It’s an easy replacement. Be sure to torque the thrust bushing to the proper manufacturers spec. though. Torque wrench with a stubby open end wrench adapter needed.
Looking at mine, I'm guessing it disconnects at the two bushings either side of the gear box, but it would need to have enough room to slide and have the coupling on the left in the picture clear the bracket. How does that happen when it's also in line with the other end of the shaft? Looks to me like it's captured between the two output shafts, and I don't see them moving. Also, does anyone know the torque and (I'm assuming crows foot adapter) size?
20221228_102349.jpg
 
That is an interesting setup that I haven't seen. The motors I've seen including @Richpatty's photo above typically there are bolts going INTO the motor.
 
I had replaced the bolts with studs and locking nuts thinking it would make the assembly stronger. They can be removed which I will do when the Stage8 hardware gets here. I think I'm going to try JB Weld first and see how it goes. Hopefully 3 good bolts and one repair will suffice. I need to adjust the amp/shutoff setting for the slide. Anyone know how to do that?
 
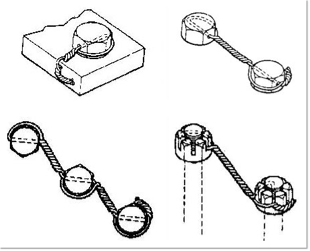
I just check my bolts today. Coach was built in February of 2022, purchased in October. All bolts had lost their torque, not loose but they easily took a 1/4 turn to tighten. I did not remove to put red LT on yet as I will be ordering three sets of the stage 8 bolts first.
As to the amperage adjustment, I have not done it but you should be able to find the procedure in the owner manual for the system in your records bag somewhere. I saw a you tube video as well last night where a guy goes thru several trouble shooting scenarios. A Newmar dealer service guy does the video.
Good luck
 
I left the covers off the motors in the bins just to make them easier to check. The bedroom one is the one I neglected to check as it's a little harder to get to especially if there's a lot of things stored under the bed, so it's getting the Stage8 setup. Actually, if it weren't for cleaning up after the rat problem, I would have continued using it until it completely destroyed itself. So, "Every curse has a blessing and every blessing has a curse".

And, THANK YOU @Richpatty and @redbaron for the Stage8 info.
 
Glad to help. I know @Neal asked about installation, but it is really pretty straightforward.

1) I started by inching out the slide in question a bit to take any tension off the motor.
2) I then removed and replaced ONE screw at a time with the special screws from Stage8.
3) You will have to be a bit forgiving with the torque of each one...as the heads need to be in specific positions to accept the locking bar. I "torqued" each one to the approx. correct amount and then advanced or backed off to align the heads.
4) Each end of the bar has different "teeth". You put the end with more teeth on first on the furthest end and then move the second bolt to mate up to the bar. It take a little finesse.
1672274428157.png

5) Once the bar is in place you slide the clips over the bolt head. They are a bit tight, so you may want to use a metal tool to help push it on... The clips are mounted correctly when they spin freely.

I hope this helps. It is not that bad. I had to do all slides since the Ventana has the motors on the FWS as well.

@redbaron - Let me know if I have missed or misstated anything.

Rich
 
@Richpatty the only thing you forgot is how to find that dang clip when it Flys away instead of sliding into place.

About 20% of my time was spent searching for the sprung spring clip.
 
The crows foot that is needed is 11/2” and the torque spec is 135lbs. You wont have an issue removing the motor. Once you loosen the trans torque bushings you can slide them on the shaft. Make sure the shaft if very clean before reinstalling the bushing. I use fine sand paper and sand along the shaft instead of around it to help provide some additional grip.
 

Latest resources

Back
Top