- Joined
- Jul 27, 2019
- Messages
- 13,387
- Location
- Midlothian, VA
- RV Year
- 2017
- RV Make
- Newmar
- RV Model
- Ventana 4037
- RV Length
- 40' 10"
- Chassis
- Freightliner XCR
- Engine
- Cummins 400 HP
- TOW/TOAD
- 2017 Chevy Colorado
- Fulltimer
- No
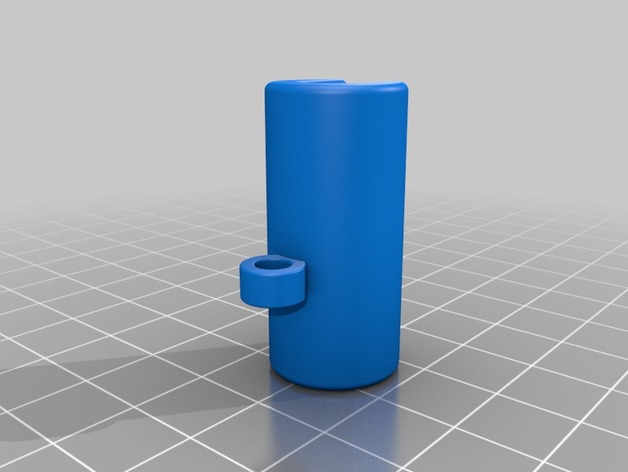
I was at a State Park one summer not long ago when a fellow Newmar Ventana owner showed me something he made out of a block of wood that he inserted into the gen compartment latch release pull handle in the left front compartment that holds the handle out as often we pull the handle and the gen compartment door doesn't spring out and unlock. I thought that was a cool idea so I texted a picture to @Chuggs and low and behold Charlie had an even better idea and sent me one of his brilliant designs:
 www.thingiverse.com
From here I knew I had to check this 3D printing thing out. I had heard about it for years but thought it must be some business thing as it sounds really expensive and not something a home user would do. I was wrong, at least not in 2018 which I think is when I got into 3D printing. RVing is begging for 3D printing as there is so much to create for storage, hooks, containers, mounts, brackets, the list goes on and on and on. My college degree was in Mechanical Engineering where CAD was a part of it so I figured why not humiliate myself in proving that I don't remember anything from way back then in the black & white era.
3D printing is the simple part, it's essentially a contraption that's like a sewing machine that heats up and melts 1.75mm plastic line from a spool and builds up layer by layer on a heated platform. The layers build up the shape until complete. Software programs take your design and convert it into the format for 3D printers. The hardest part is the design work and there are basic programs to do the job to full on CAD/CAM software just like is used to design the parts for cars, planes, everything.
I started with Tinkercad as it seemed very easy and has tutorials. I knew I wanted to take it to the next level so I then moved on to a program called AutoDesk Fusion 360 which is FREE to home users and business startups. Lots of great YouTube videos to get you started and of course a forum community to get help. Little by little you'll learn, export your design to a .STL file, that .STL file goes into a program such as PrusaSlicer which converts it to a gcode file that the 3D printer uses for its instructions to lay down the plastic.
3D filament comes in various types depending on the use. Also many colors available. Filaments and anything 3D printing is available on Amazon.
I have two 3D printers, the one I highly recommend is the Prusa i3 MK3 and I take it along with me in the RV and print should I need or just want to play.
It has been a lot of fun and it's a great little hobby not to only create something useful but also to just get your mind off of things. I have an Amazon Echo Show 5 I have under mounted below the bedroom TV and I designed a mount which has become very popular on Thingiverse with over 1500 downloads now and growing around 100 downloads a day.
I've printed a ton of things, some are my designs, some are other designs as you can download things from various sites such as Thingiverse. Some of my favorite or most useful things are:
Newmar Hood Release Block by chuggs
When I try to release the front (hood?) compartment latch...I pull on the release handle. When I go to open the compartment...the latch has re-engaged. I needed my wife to continuously pull on the release handle while I lift the hood and place it on it's support rod. So, to enable me to open...
www.thingiverse.com
From here I knew I had to check this 3D printing thing out. I had heard about it for years but thought it must be some business thing as it sounds really expensive and not something a home user would do. I was wrong, at least not in 2018 which I think is when I got into 3D printing. RVing is begging for 3D printing as there is so much to create for storage, hooks, containers, mounts, brackets, the list goes on and on and on. My college degree was in Mechanical Engineering where CAD was a part of it so I figured why not humiliate myself in proving that I don't remember anything from way back then in the black & white era.
3D printing is the simple part, it's essentially a contraption that's like a sewing machine that heats up and melts 1.75mm plastic line from a spool and builds up layer by layer on a heated platform. The layers build up the shape until complete. Software programs take your design and convert it into the format for 3D printers. The hardest part is the design work and there are basic programs to do the job to full on CAD/CAM software just like is used to design the parts for cars, planes, everything.
I started with Tinkercad as it seemed very easy and has tutorials. I knew I wanted to take it to the next level so I then moved on to a program called AutoDesk Fusion 360 which is FREE to home users and business startups. Lots of great YouTube videos to get you started and of course a forum community to get help. Little by little you'll learn, export your design to a .STL file, that .STL file goes into a program such as PrusaSlicer which converts it to a gcode file that the 3D printer uses for its instructions to lay down the plastic.
3D filament comes in various types depending on the use. Also many colors available. Filaments and anything 3D printing is available on Amazon.
I have two 3D printers, the one I highly recommend is the Prusa i3 MK3 and I take it along with me in the RV and print should I need or just want to play.
It has been a lot of fun and it's a great little hobby not to only create something useful but also to just get your mind off of things. I have an Amazon Echo Show 5 I have under mounted below the bedroom TV and I designed a mount which has become very popular on Thingiverse with over 1500 downloads now and growing around 100 downloads a day.
I've printed a ton of things, some are my designs, some are other designs as you can download things from various sites such as Thingiverse. Some of my favorite or most useful things are:
- @Chuggs generator pull handle block
- Containers for my pantry sliders to allow storage to the full height of the drawer above
- Echo Show 5 mount for bedroom
- Hooks for coffee mugs over dish storage area
- Organizer for my desk that holds remotes, AirPods, Gum, Pens, Flashlight
- Mounts for SeeLevel, Sani-con, and Drainmaster controls
- Candy Jars for Lifesavers
- Wet bay port cover that covers around the sani-con hose
- New bezel for my dash radio
- Water filter support block
- More at NealC's Thingiverse Profile

")
")