Welcome to RVForums.com

  • Register now and join the discussion
  • Friendliest RV Community on the web
  • Modern site for PC's, Phones, Tablets - no 3rd party apps required
  • Ask questions, help others, review campgrounds
  • Get the most out of the RV Lifestyle
  • Invite everyone to RVForums.com and let's have fun
  • Commercial/Vendors welcome

Ridiculously cheap, ridiculously easy mods to consider

Welcome to RVForums.com

  • Register now and join the discussion
  • Modern secure site, no 3rd party apps required
  • Invite your friends and let's have fun
  • Commercial/Vendors welcome
  • Friendliest RV community on the web
This goes on the wall side connection.
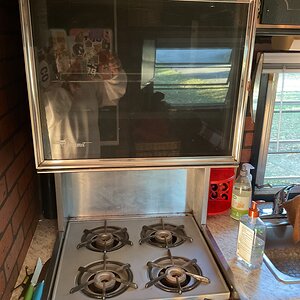
My connection , I think is different. It comes out of the top of the faucet apparatus and appears to be a different size fitting. Hope it works on the toilet though.
 
Another cheap easy one for those of us with analog gauges, putting dots where the gauges would normally be when all is good while driving. just a glance tells you all is good, or not. View attachment 163
Ok, I thought this was a great idea, so added dots to my gauges earlier in the year, but clearly am doing something wrong. I've moved the dot on my fuel gauge at least a dozen times, but cannot find a spot where it will stay lined up with the gauge. Very frustrated about this.
 
Ok, I thought this was a great idea, so added dots to my gauges earlier in the year, but clearly am doing something wrong. I've moved the dot on my fuel gauge at least a dozen times, but cannot find a spot where it will stay lined up with the gauge. Very frustrated about this.
I understand your frustration. I had the same problem so I just disconnected the fuel gauge. See if that works for you😁🙄
 
Ok, I thought this was a great idea, so added dots to my gauges earlier in the year, but clearly am doing something wrong. I've moved the dot on my fuel gauge at least a dozen times, but cannot find a spot where it will stay lined up with the gauge. Very frustrated about this.
I'm having the same problem but it's with the speedometer. Since I basically needed to cover all the numbers, now I can't see anything.
 
Decided that I liked taking the cooktop outside to cook stuff like eggs and bacon to keep the mess and cleanup easier and realized if I set it directly on the table, the fans underneath didn’t have a good way to vent. So I built this little stand. It’s easy to carry and has plenty of ventilation underneath. Just thought I would share as an FYI.

FLSteve(y)

UPDATE: SINCE POSTING THIS AND LEARNING FROM SOME OF YOU THAT THERE WERE SUPPOSED TO BE FOUR (4) LEGS ATTACHED TO THE BOTTOM OF THE UNIT, I WENT BACK TO THE “BLACK NEWMAR CASE” THAT ALL THE OWNERS DOCUMENTS CAME IN AND LOW AND BEHOLD THE LEGS WERE IN THERE. GUESS I JUST DID NOT KNOW WHAT THEY WERE FOR ON DAY ONE. SO NOW I HAVE THE LEGS AND THE HOME-MADE STAND. THINK I WILL ATTACH THE LEGS AND SEE HOW THAT WORKS. SORRY FOR CRYING WOLF.

IMG_0044.jpgIMG_0045.jpgIMG_0046.jpgIMG_0047.jpg
 
Last edited:
Very nice - what type of wood is that? Looks great! Also looks like you’re well set up for wood working.
 
Very nice - what type of wood is that? Looks great!
Just some scraps I had laying around from past projects. I think the ends are cypress and the cross pieces are poplar.
 
Just some scraps I had laying around from past projects. I think the ends are cypress and the cross pieces are poplar.
Nice - I don’t see cypress out here and thats some good looking grain for poplar - I would have guessed ash.
 
Wooden divider for storage bay about 80% complete. Will be adding a vertical cargo net to allow more efficient use of space in the rear area of the large passthrough bay. Cut to fit from a 1x8x8. Hopefully will keep load shifting to a minimum.

PXL_20240415_150004320.jpg


.40
 
Nice - I don’t see cypress out here and thats some good looking grain for poplar - I would have guessed ash.
@Rich W. ... actually you might be right on the ash. I am not the best at ID'ing wood.
 

Latest resources

Back
Top