TJ&LadyDi
RVF "Dinosaur"
Yes, it does. Much like trying to get 8-point crimps right on 20-ga hulls without buckling the tube.@TJ&LadyDi does this almost sound eerily like reloading? I am staying away.
TJ
Follow along with the video below to see how to install our site as a web app on your home screen.
Note: This feature may not be available in some browsers.
Yes, it does. Much like trying to get 8-point crimps right on 20-ga hulls without buckling the tube.@TJ&LadyDi does this almost sound eerily like reloading? I am staying away.
Sorry to hear...hope everything is okay. Probably no pickleball for awhile?Just had knee surgery yesterday so no rush.
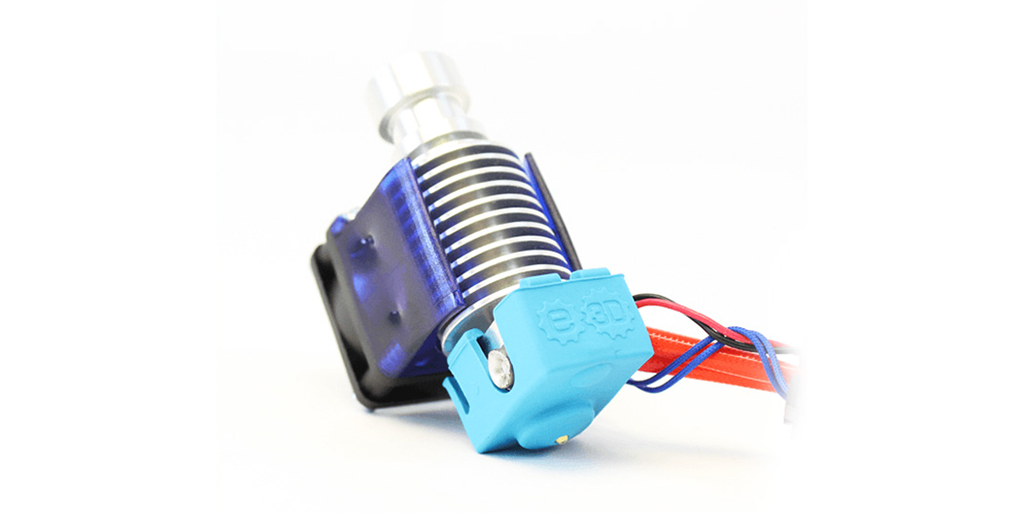
Good instructions for re-assembly of hotend:
Slightly different than the Prusa hotend, but through step 20 seems about the same (different collet)How To: Successfully Assemble an E3D v6 All-Metal HotEnd | MatterHackers
This detailed guide by the Pros at MatterHackers walks you through the steps to correctly assemble the industry's leading hotend.www.matterhackers.com
") Glad you're up and running. I'm thinking of burning some PLA like incense. Miss the smell
Glad you're up and running. I'm thinking of burning some PLA like incense. Miss the smell 


